Why you need a staging environment
Moving fast should not mean breaking things for your users. While testing on localhost is a good start, you need a near identical replica of production to catch any bugs before your code goes live. That is where a staging environment comes in. Heroku pipelines handle the infrastructure layout for you, keeping your deployment workflow clean and automated.
Step 1: Create your pipeline and staging app
Most developers start with a single Heroku app connected to GitHub, where pushing to your main branch deploys straight to production. Moving to a continuous delivery (CD) workflow means breaking this direct path. Grouping your environments into a pipeline lets you intercept those automated updates, allowing you to test code within an isolated boundary before it ever impacts your users.
Every git push builds on staging first under this setup, leaving production untouched. This release process catches environment issues before they impact production. Google Cloud’s DORA research identifies deployment automation and staging environments as core technical capabilities that significantly reduce change failure rates.
What is change failure rate (CFR)?
Change Failure Rate (CFR) is the percentage of software deployments to production that result in a failure, requiring a rollback, hotfix, or emergency patch.
Set up your pipeline in the Heroku Dashboard
Before creating your pipeline, open your existing production app in the Heroku Dashboard, navigate to the Deploy tab, and turn off automatic deployment. This will prevent any operational conflicts after your pipeline has been set up. Once disabled, setup your pipeline in the UI by following these steps:
-

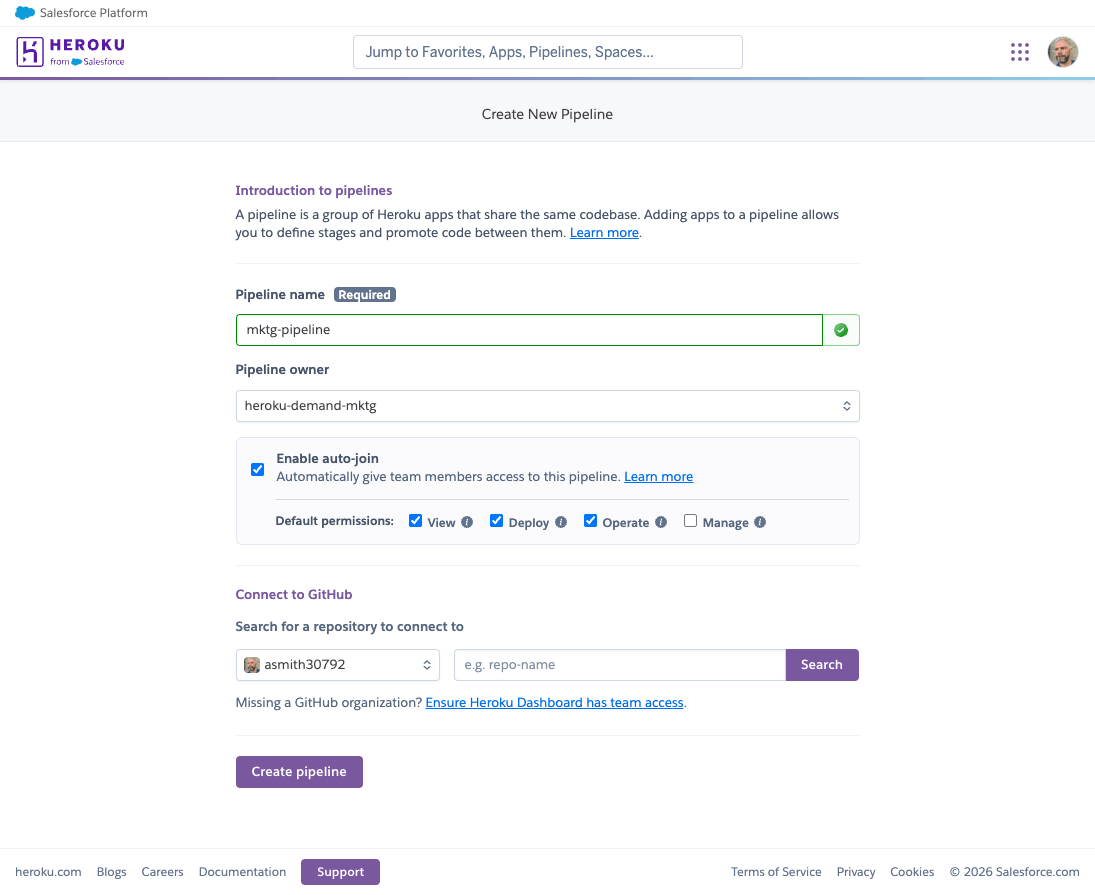
Create a pipeline
Select New at the top right of the Heroku Dashboard, click Create new pipeline, give it a unique name, and link your GitHub repository.
PreviousHow to send HTML form data to an email addressNextHow to Set Up Auth0 Organizations (SSO, Branding & Invitations)Related posts

Vellinko – Sign PDFs in the browser without uploading them
0Hacker News New
Show HN: Vivio House, an interactive 3D headquarters
0Hacker News New
Pushover – Simple Notifications
0Hacker News New
The Gift of It's Your Problem Now (2021)
0Hacker News New
Implied News: News X Prediction Markets
0Hacker News New
Show HN: OpenDocBot - bring your own model to Word, Excel and PowerPoint
0Hacker News New