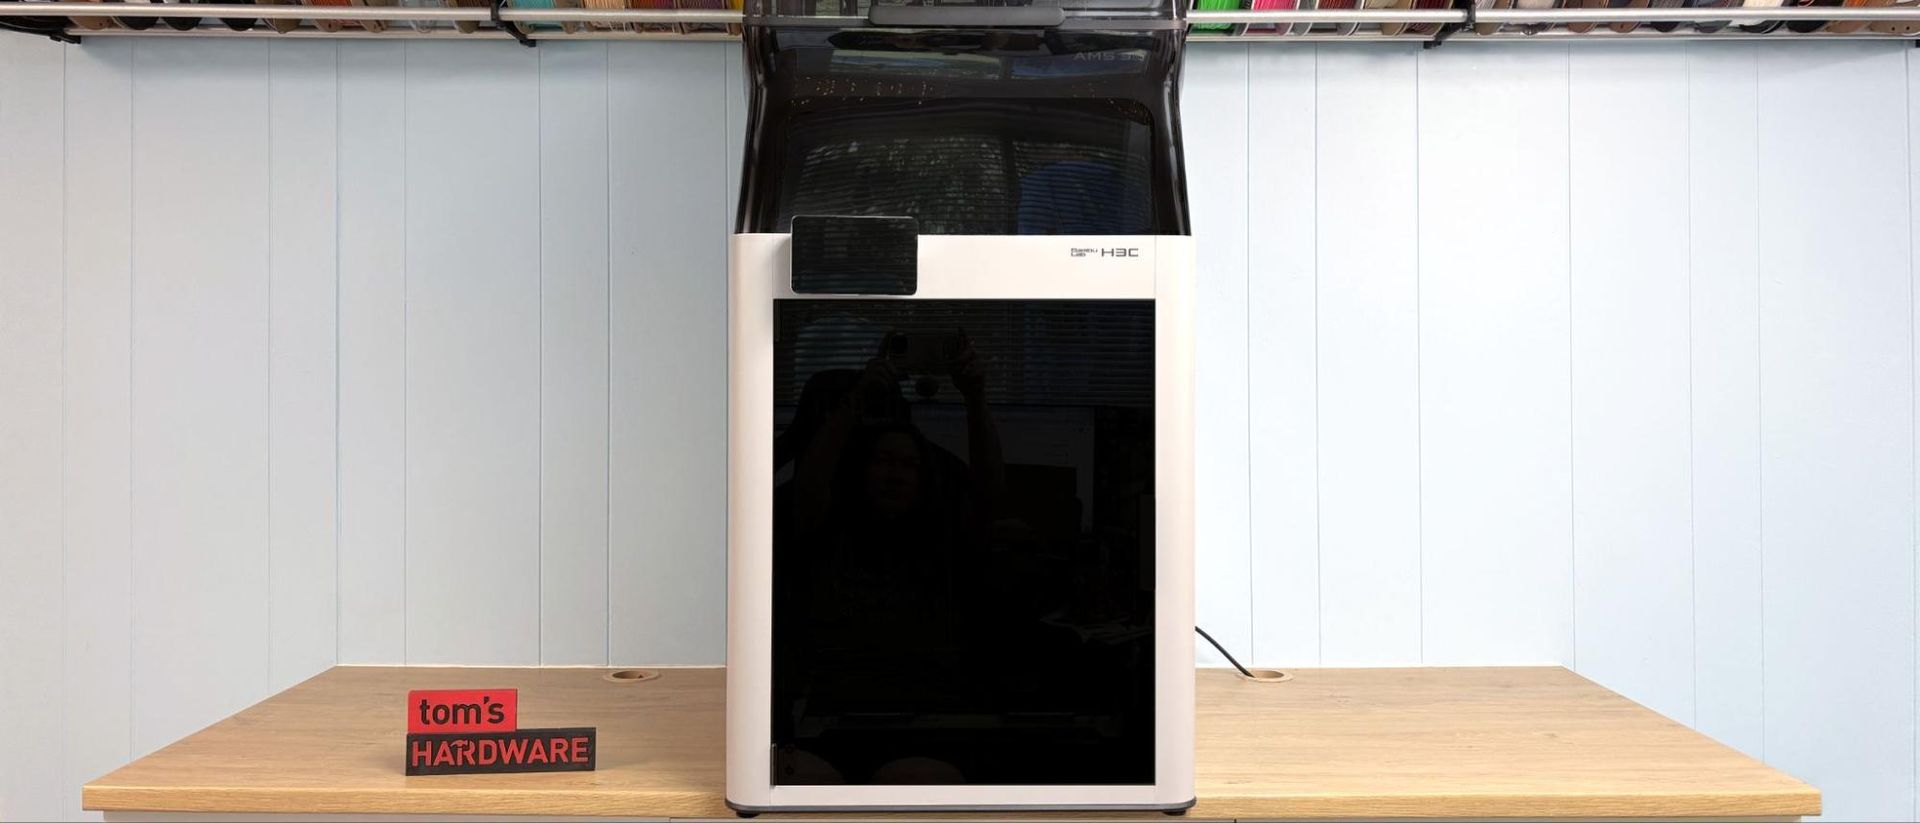
The Bambu Lab H3C is the printer we’ve been waiting for: a true Bambu tool changer. It has nine “Swaptek” tools that use a technology similar to the H2C Vortek rack, except each nozzle is built into a lightweight, hardwired tool with a dedicated filament path. The H3C is Bambu’s fastest multicolor 3D printer, and though it reduces waste, it does not eliminate it.
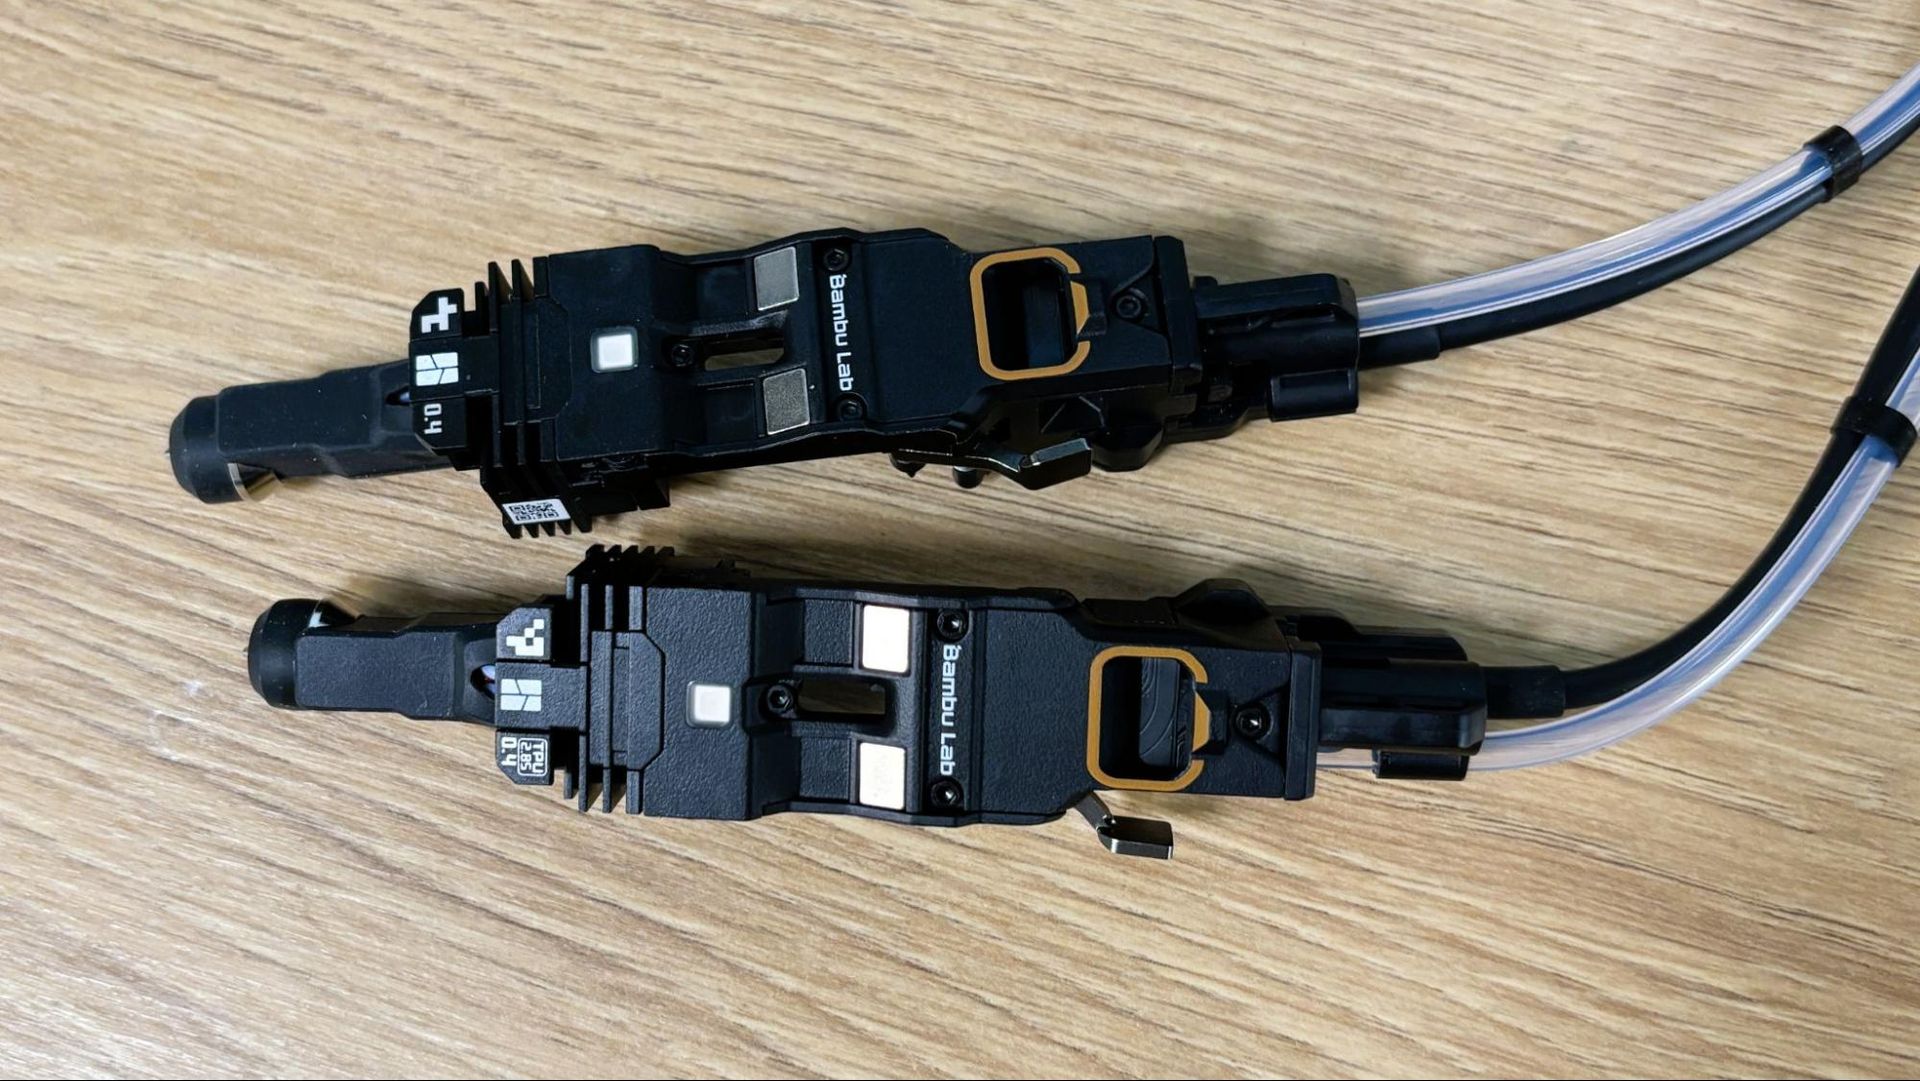
The H3C comes with a surprising “old school” technology: the ability to print 2.85mm filament. This is in response to China’s increasing fascination with 3D-printed shoes made with a wide variety of squishy TPU. Bambu sent along a few spools of their new super soft 75A TPU to show off, and it does make for comfy footwear. Each unit comes with one special 2.85mm tool as a standard feature, though you can buy a “normal” 1.75mm tool for $59 if you’re not into the novelty of phat filament.
You will also be able to add cutting, drawing, embossing, and foil transfer tools to the system. These were not available at the time of review, but we’ve seen these accessories on the H2D and A2L. The 3D printer will NOT come with a laser variant.
Bambu is checking off yet another item from the user wish list: the ability to print with more than one nozzle size. Because this is more of a software upgrade, you’ll also gain the ability to mix nozzles with Bambu’s other dual nozzle systems: the H2D, H2C, and X2D. The H2D will get the ability first, and the other printers will be updated by March.
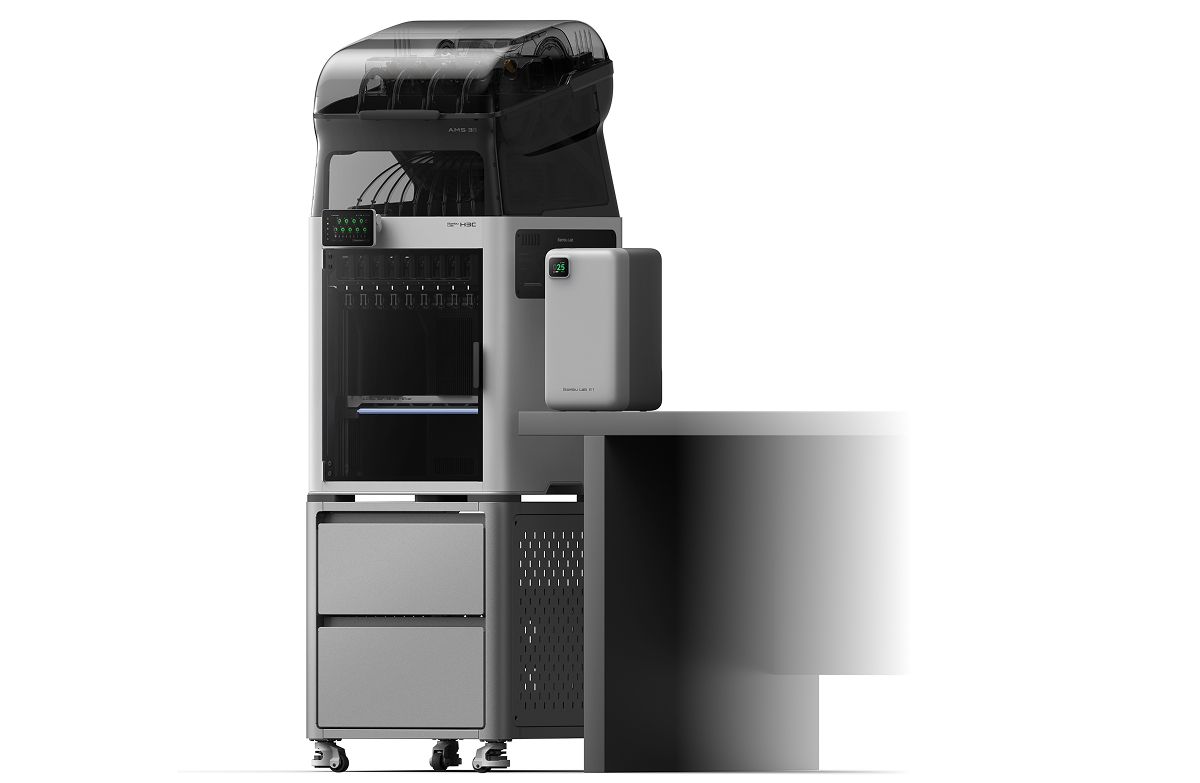
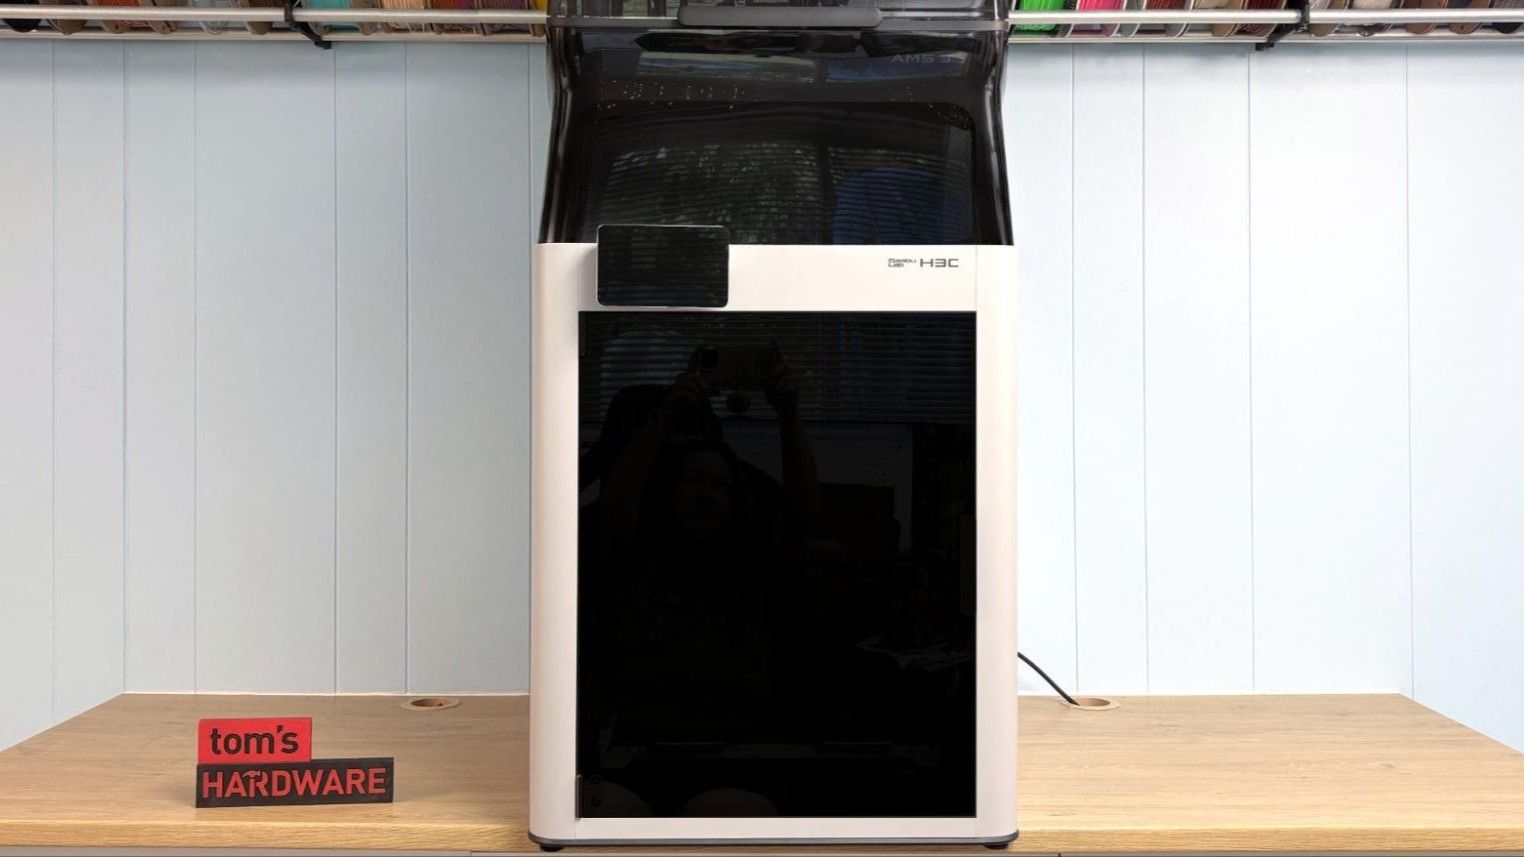
The H3C has a 330 x 320 x 325mm build volume (the same as the H2C) and a massive “AMS” type module perched atop the main unit that holds nine spools. This gives it a somewhat towering mushroom shape that’s over three feet tall. It did not fit on my studio counter, which is a standard-sized IKEA kitchen countertop with a filament rack three feet off the surface. When we parked it on my industrial-grade shelving unit next to the H2D, even my 6’4” husband needed a step stool to load filament. Bambu was prepared for this problem and created a special rolling cart for the machine to make it more accessible. This is the first time the company has offered custom furniture for one of their printers and is an optional purchase that I highly recommend.
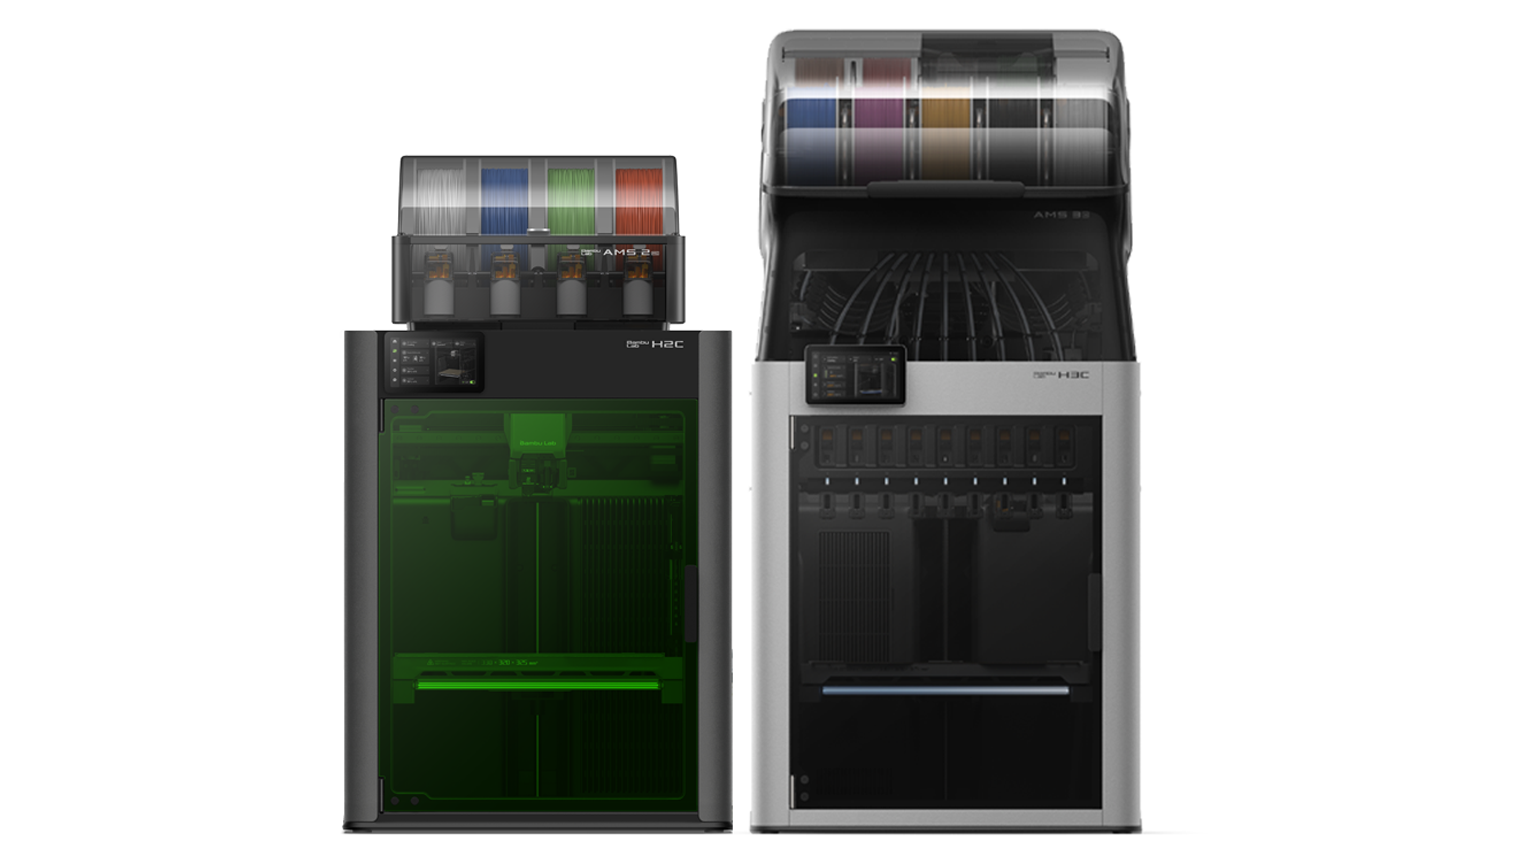
All nine tools are integrated into the bottom of the AMS 3H, which means the H3C only comes as a nine-tool 3D printer. There is no such thing as a single-color H3C. If nine colors aren’t enough for you, the printer can be hooked up to as many as four “normal” AMS units with the help of an optional buffer. Unfortunately, all outside AMS units need to run through the 5th tool slot, so you will lose the purge-free perk of the H3C.
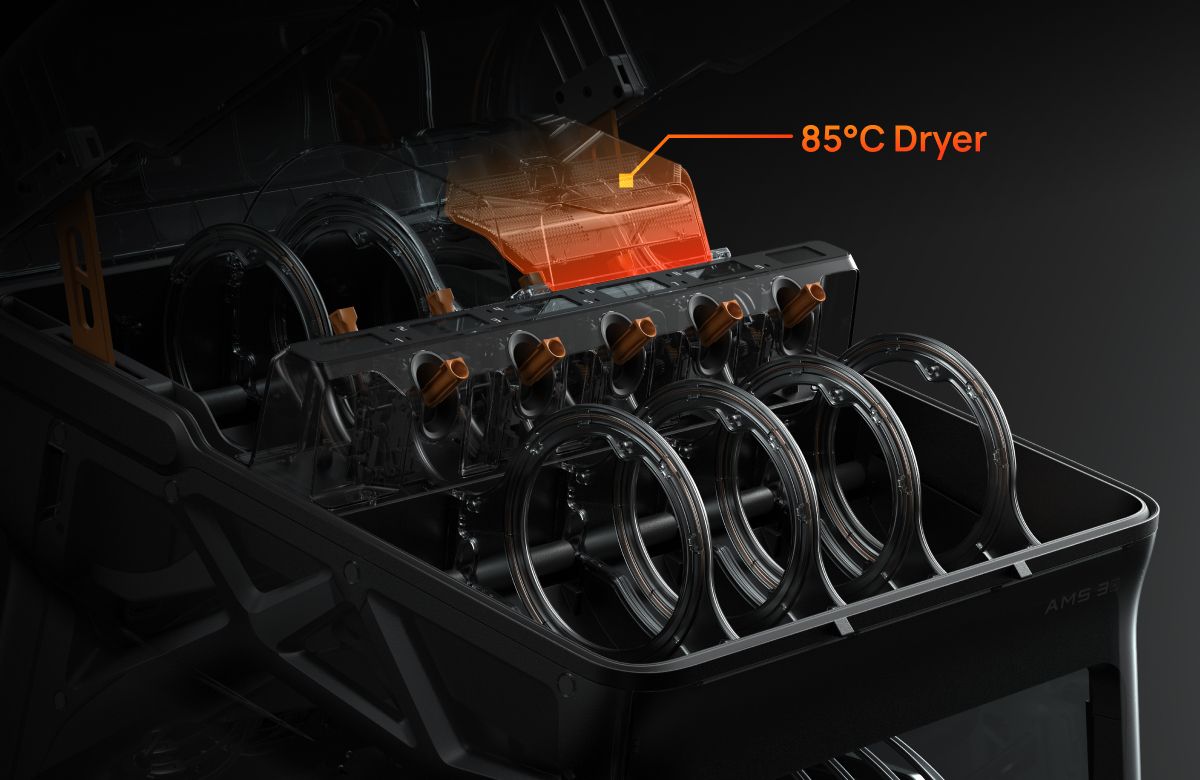
The AMS 3H does not have motorized rollers, as retraction is unneeded on a tool changer. Seven of the slots have a TPU bypass, something we first saw on the single spool AMS HT. Two of the slots are nestled within an interior chamber for drying at up to 85°C. Though you can only dry two spools in the AMS 3H, you can run the dryer while printing, as it has its own power supply. The sealed dryer does not “leak” enough heat to dry the rest of the chamber…we checked. But that also means you don’t have to worry about the dryer melting a spool of PLA left in a nearby slot.
The FlexFeed extruder mounted on the toolhead is amazing. It can self-adjust to handle normal 1.75mm PLA or expand to push 2.85mm TPU quickly and without issue. The Bambu Lab H3C comes standard with eight .4mm nozzles for 1.75mm filament and one .4mm nozzle for 2.85mm filament. The nozzles are held in place with three screws and are pretty easy to swap out. You do need an entirely separate tool (with larger openings) for the 2.85mm filament. Because the H3C can print with multiple nozzle sizes, you could leave one or more tools dedicated to .2, .6, or .8 nozzle sizes if that fits your workflow.
For example, slots 6 and 8 are located inside the dryer and have a TPU bypass. You could dedicate a .6mm nozzle to these tools to better handle TPU, something like PA CF, which both benefit from toasty dry filament and an extra-wide nozzle. All nozzles for the H3C are hardened steel (HRC 55+) by default.
My H3C did have some pre-launch issues and is running Beta firmware that was updated several times during the review. The printer developed an annoying clicking sound coming from the left-side stepper motor, and one of the tools has a tendency to tangle and catch on the other Bowden tubes, causing it to dismount unexpectedly – and annoyingly – during long multicolor prints. I printed a few TPU spacers to try and solve this problem without much success as of yet.
The Bambu Lab H3C is launching with a retail price starting at $2,499 for all nine tools (eight standard 1.75mm and one 2.85mm). This is only $100 more than the launch price of the H2C. Additional tools and nozzle sizes will be available, though we do not have all the pricing at this time. A bundle that includes the Bambu Station (rolling cart) starts at $2,799. This makes the machine a bit on the spendy side, but for a helmet-class, honest-to-goodness tool changer with Bambu Lab’s ease of use, this 3D printer has earned its place on our Best 3D Printer of 2026 list.
Specifications: Bambu Lab H3C
Build Volume | 330 x 320 x 325 mm (12.99 x 12.59 x 12.79 inches) |
Material | PLA/TPU/ABS/ASA/PA/PC/PET/PPS/Fiber reinforced (up to 350 degrees) |
Extruder Type | Direct Drive |
Nozzle | .4 mm |
Build Platform | PEI textured spring steel sheet (120 degrees) |
Bed Leveling | Automatic |
Filament Runout Sensor | Yes |
Connectivity | WiFi, LAN, USB Stick |
Interface | 5-inch Touch Screen |
Machine Footprint | 493 x 571 x 1016 mm (19.40 x 22.48 x 40 inches) |
Machine Weight | 36.28 KG (79.98 lbs) |
MSRP | |
Release Date | November 3, 2026 |
Bambu Lab H3C: Included in the Box
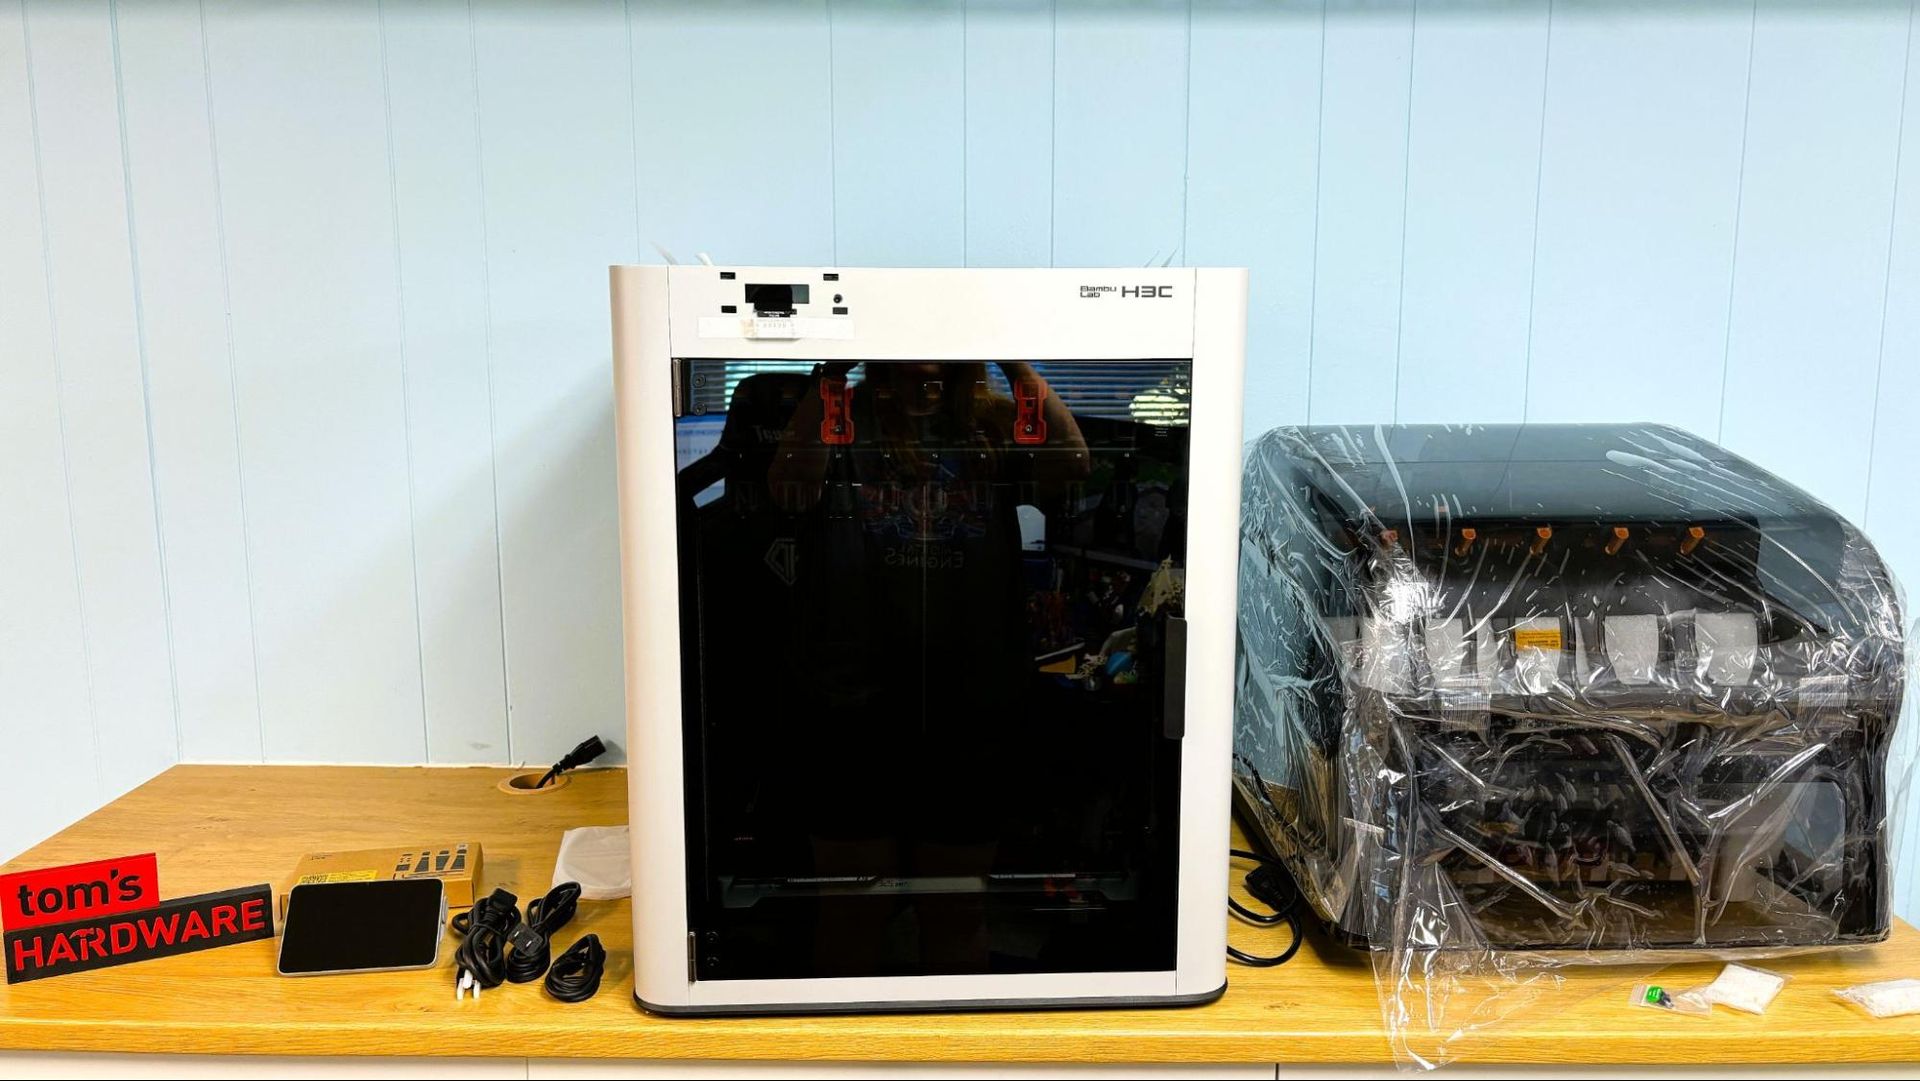
The Bambu Lab H3C comes with a toolkit and the cables needed to assemble your 3D printer, as well as a few spare parts. The printer is preloaded with files, including a scraper that you can build yourself with the included parts. There’s also a quick start guide for both the base unit and the AMS 3H.
For the review, Bambu Lab provided spare printer tools for both 1.75mm and 2.85mm filaments, as well as several spools of PLA Palette and 2.85mm TPU 75A. We also received a Bambu Station for the review.
Design of the Bambu Lab H3C
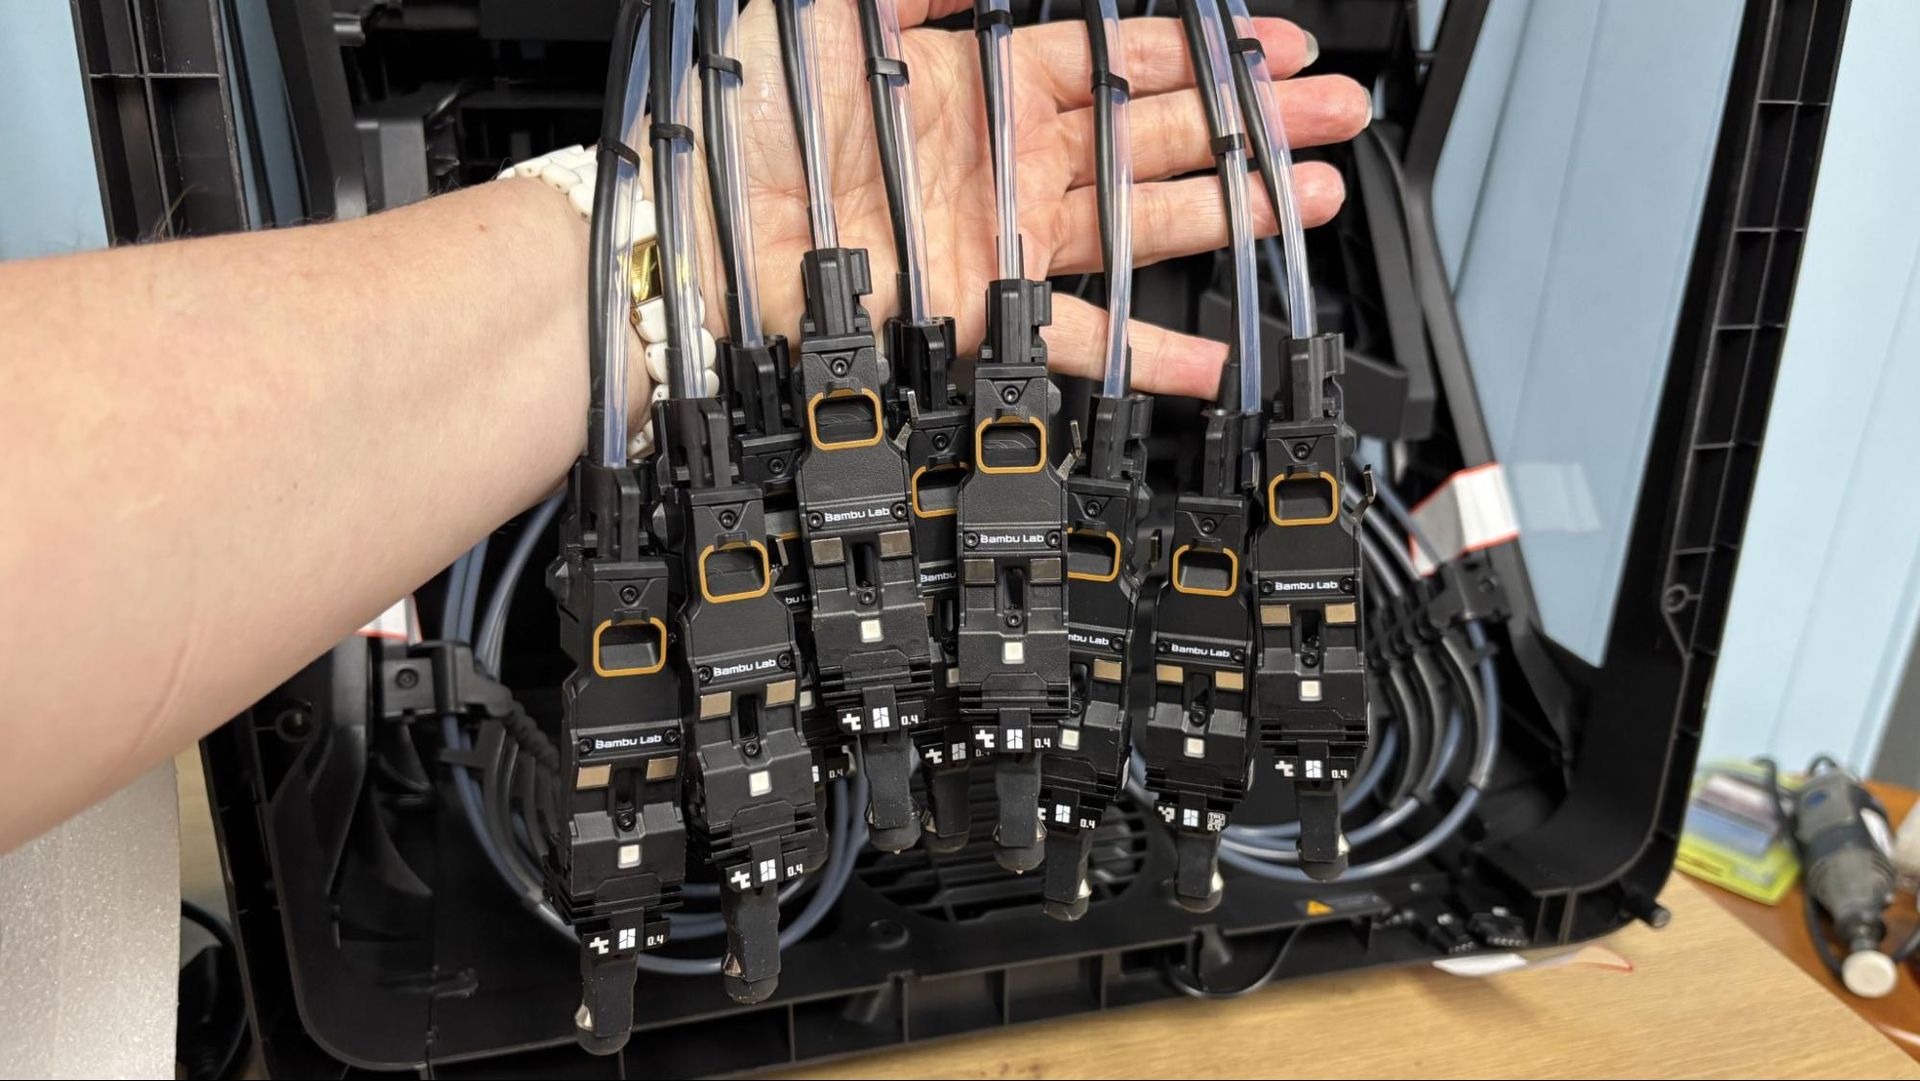
The H3C is an incredible piece of hardware. The Swaptek system has nine tools, each with its own filament path, heater, and hardened steel nozzle. The FlexFeed extruder has cooling and everything else. Each nozzle stays loaded and is preheated for lightning-fast filament swaps. I clocked it at six seconds from printing one color to printing the next.
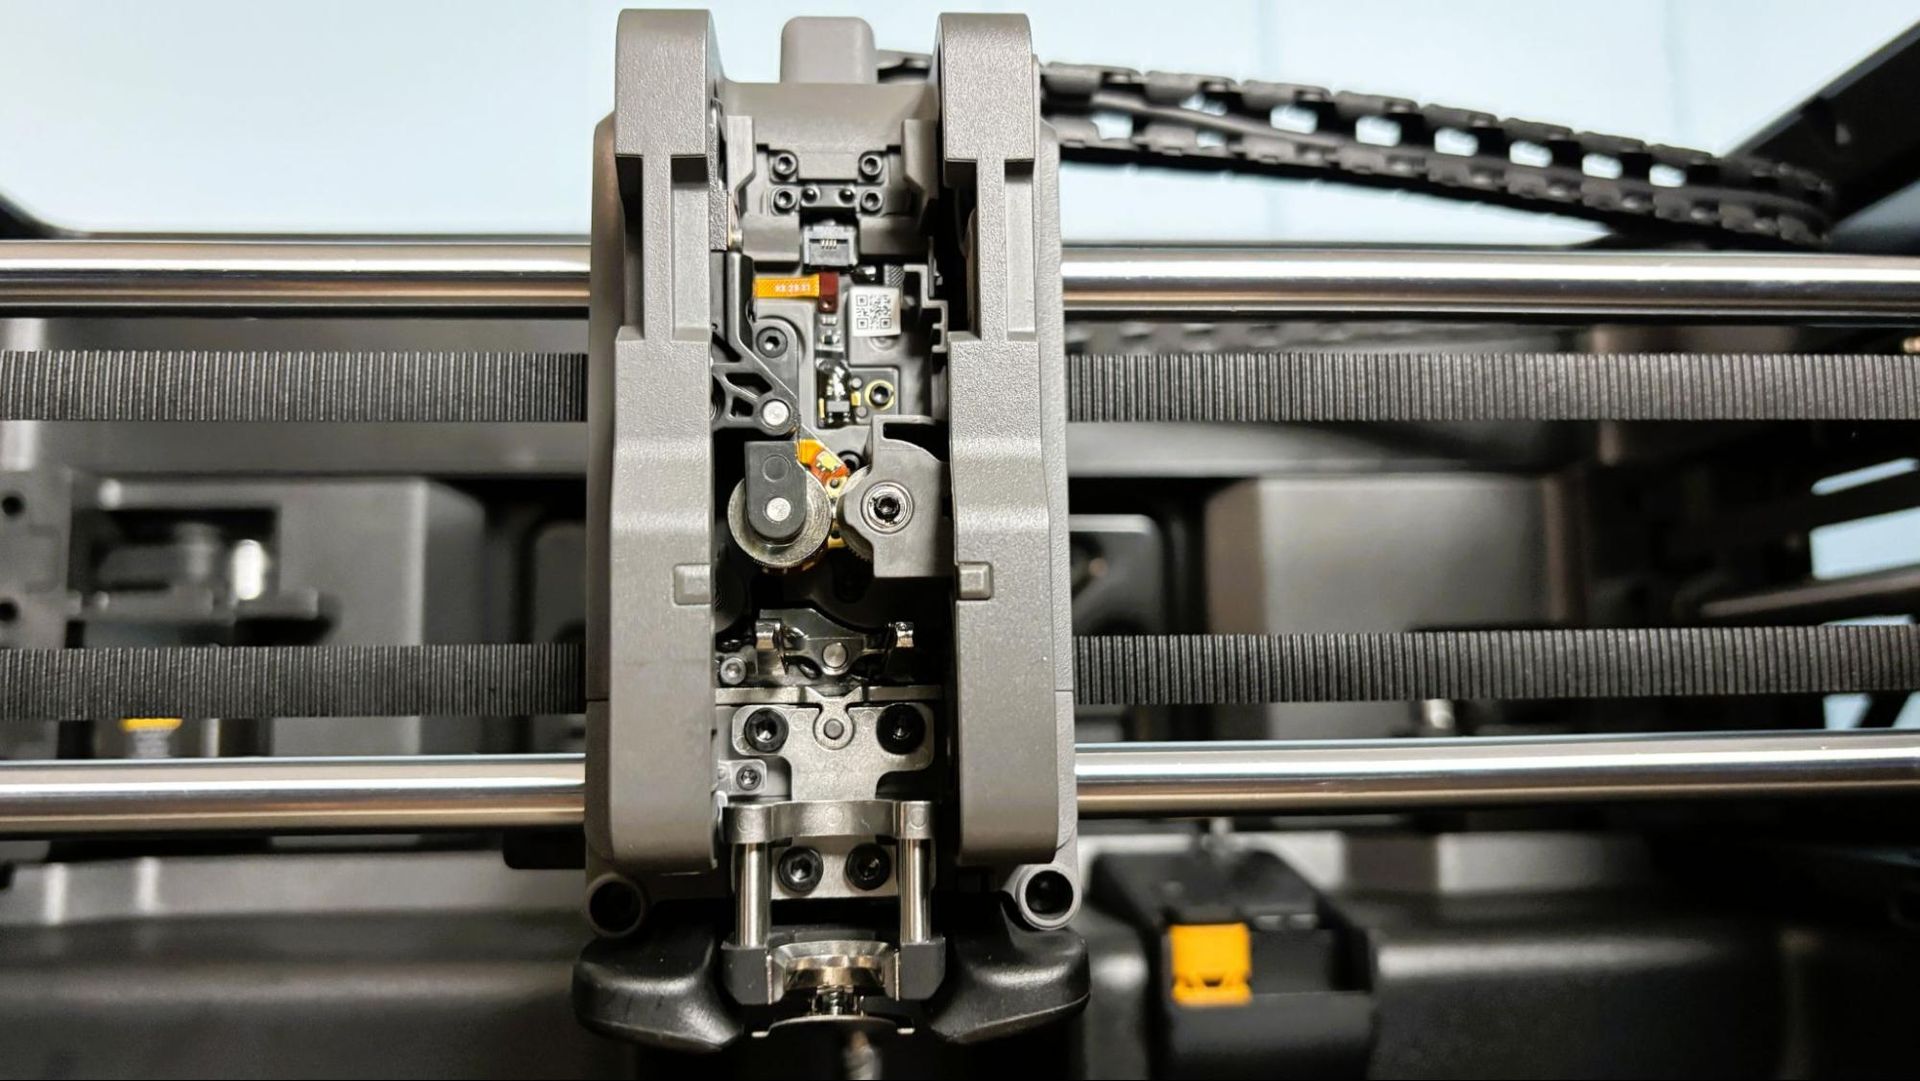
The tools and nozzles come in both 1.75 mm and 2.85 mm filament sizes. Each tool has a nozzle attached by three screws, which can be swapped with different sizes. The H3C ships with one 2.85mm tool, but you have the option to purchase more tools if you want to customize your configuration. Though not ready at the time of this review, Bambu Lab will be offering tools for cutting, drawing, debossing, and foil transfer at a later date.
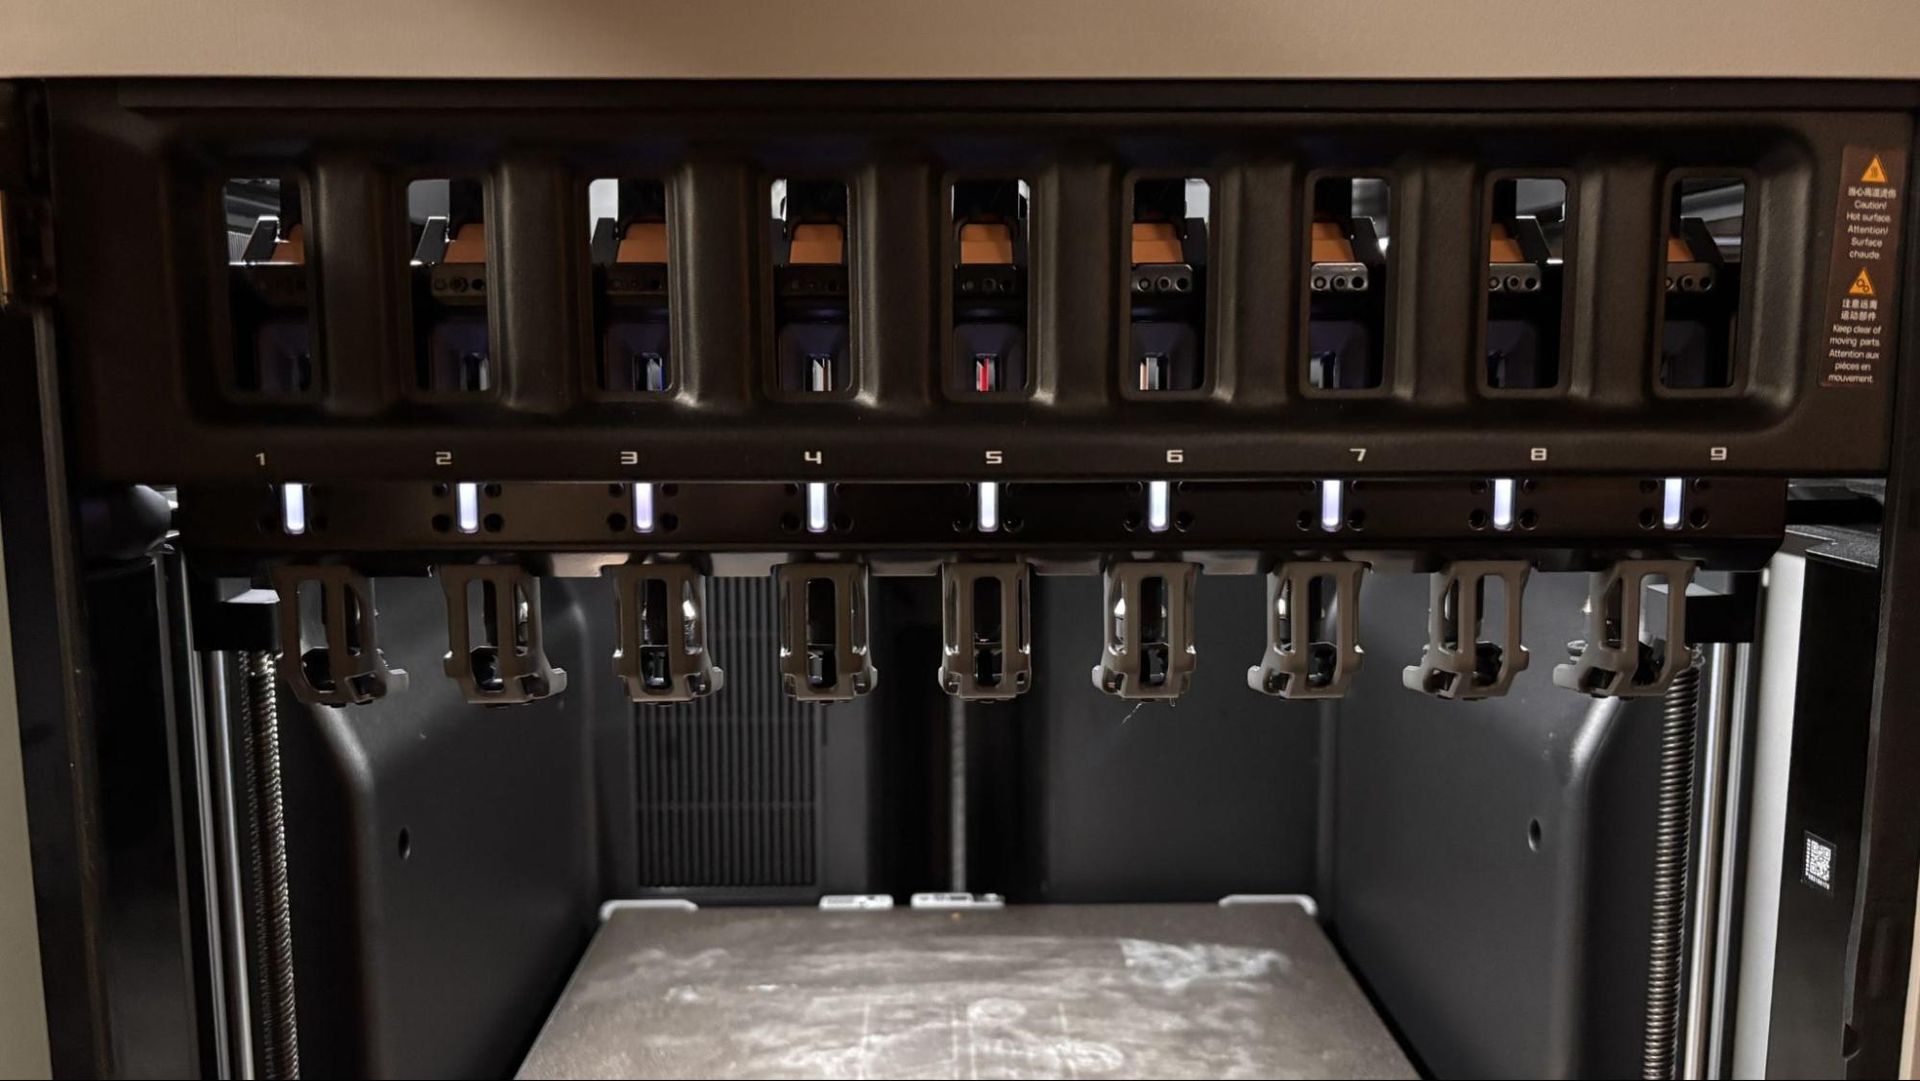
The tools dock on a front-mounted rack that retracts, allowing the build plate to be viewed from the front of the printer. This is a not-so-subtle jab at Prusa’s INDX, which has tools mounted to a fixed rack that one must peer through to see the first layer printing. It adds a layer of unneeded complexity, but it also looks pretty cool in action.
The photo below shows all nine tools lowered, using a maintenance setting. Normally, only one tool lowers at a time while in use.
The AMS 3H
Unlike previous Bambu Lab 3D printers, the AMS is required, not optional. Instead of a box that can be parked here or there, the AMS 3H is designed to screw into the top of the H3C. The plastic sides have a weird organic shape, but are actually quite practical – hidden side panels pop out for maintenance, allowing you to reach into the machine. The massive lid can be propped open, which is good because it’s most likely going to be over your head.
The tools ship attached to the bottom of the AMS. Though the H3C has the same build volume, and the same length and width as the H2 line, it is doubtful that an H2 can be upgraded to an H3C by simply plopping an AMS 3H on top of an older machine.
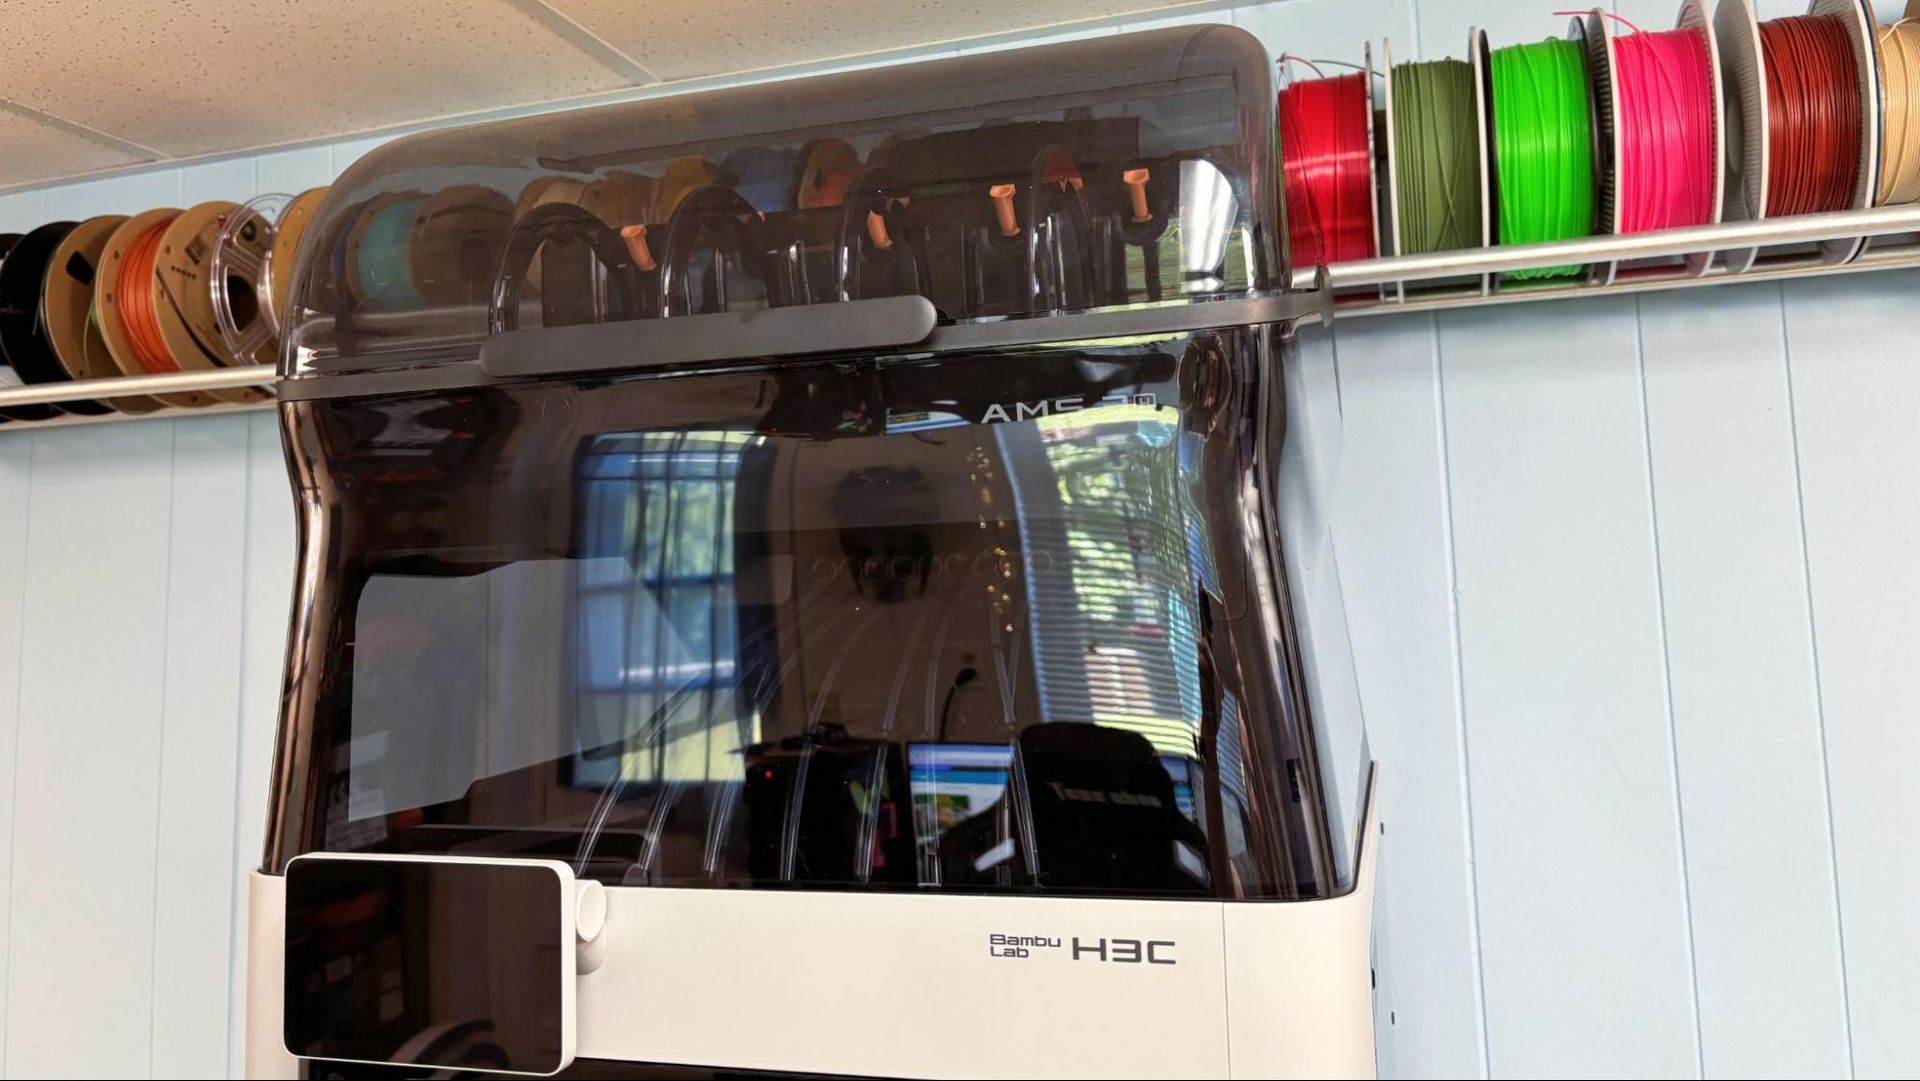
The AMS 3H has a separate chamber with a magnetically attached lid covering slots 6 and 8, which can dry filament at up to 85°C. All filament slots except 2 and 4 can bypass the AMS feeders through a hole in the bottom to directly feed TPU to the tools. The spool slots are numbered in a zigzag method, with 2,4,6 and 8 on the back row and 1, 3, 5, 7, and 9 on the front. All the filament feeders are in the middle of the two rows, with the even-numbered spools feeding forward like always, and the odd spools feeding backward. It can get a bit complicated if you’re not using Bambu-branded filament with RFID tags. Being on the short side, I have to use a step stool to see the feeders.
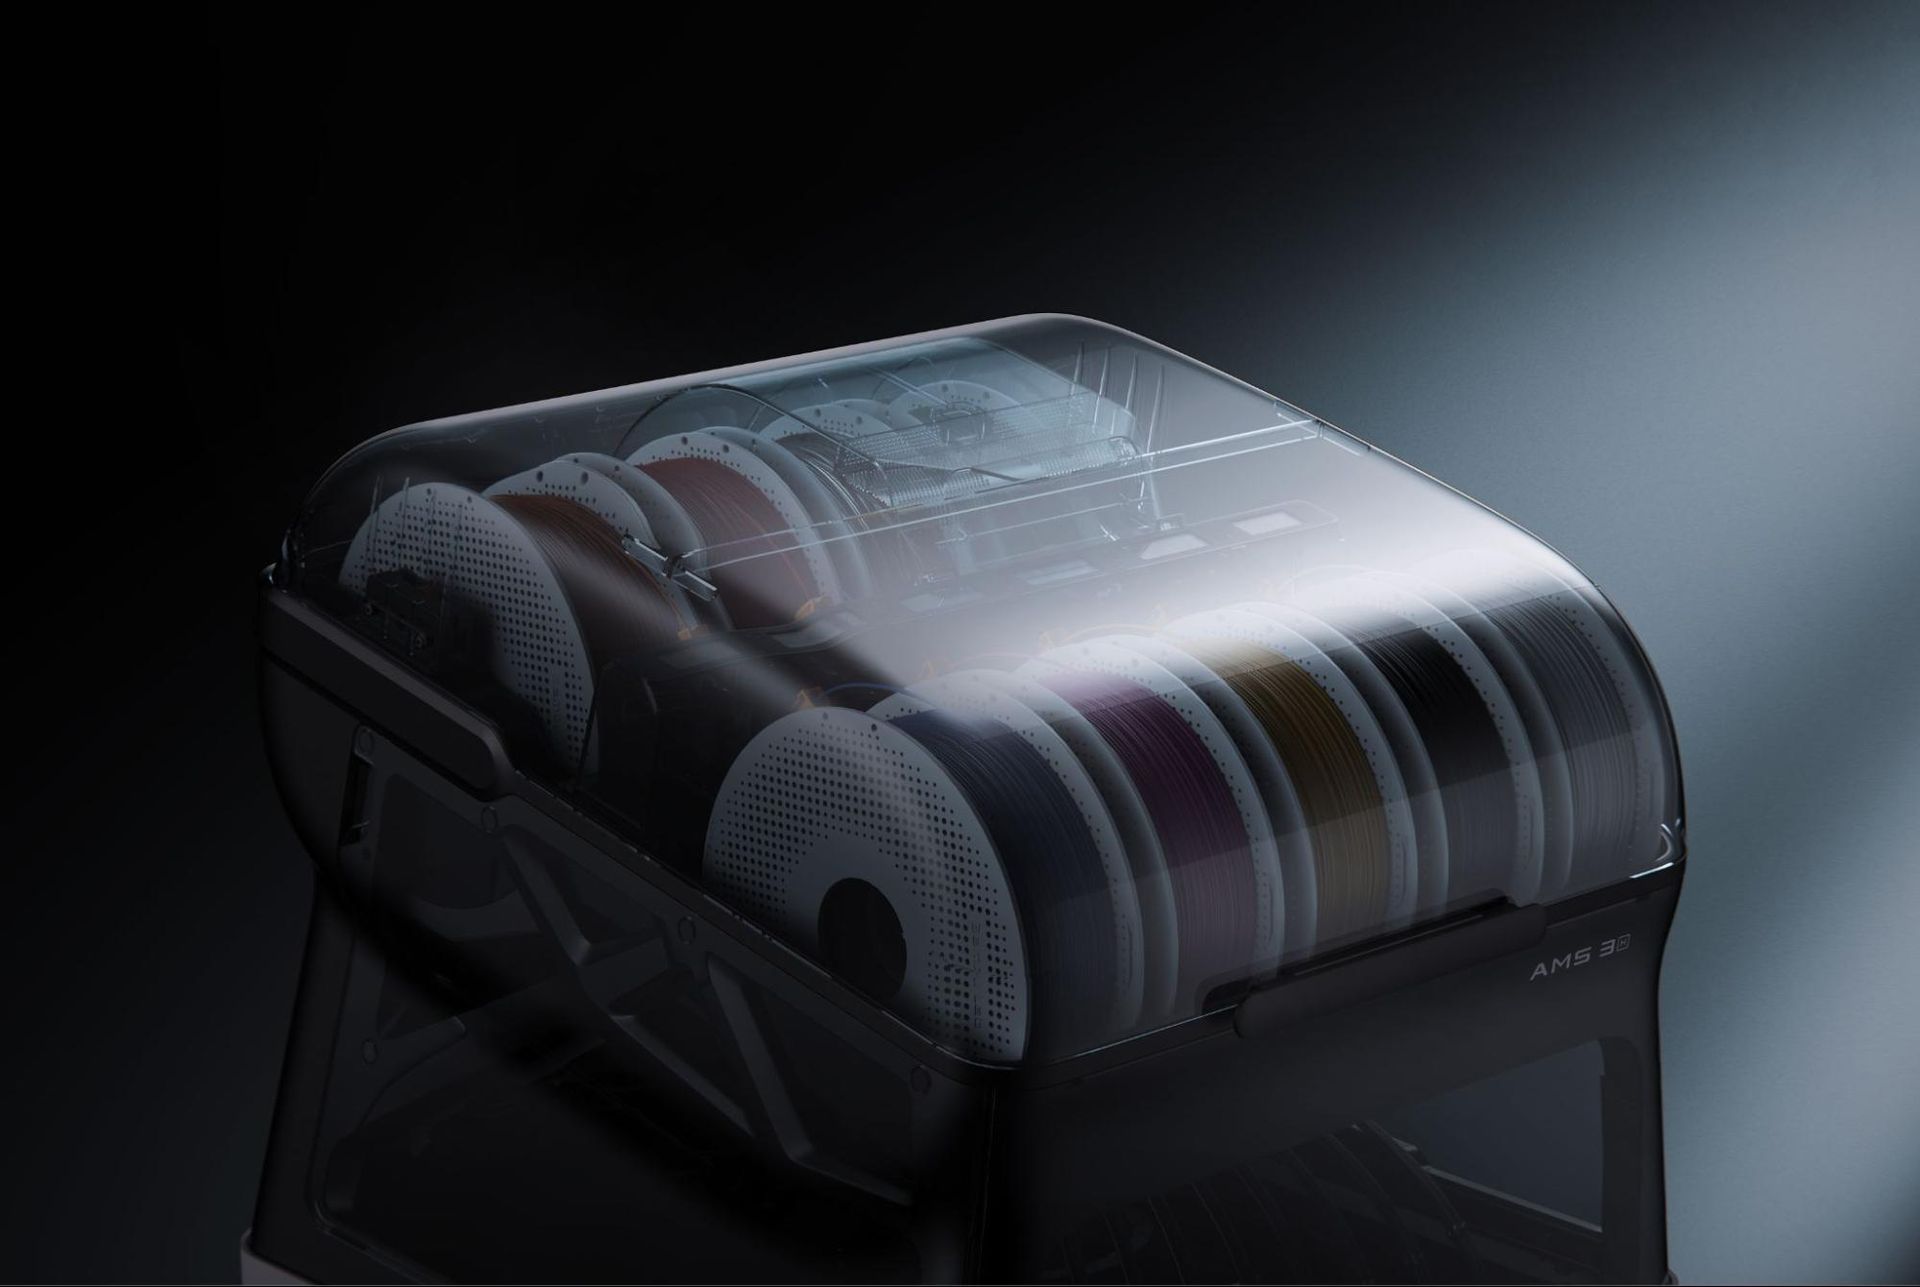
The body of the Bambu Lab H3C looks similar to the rest of the H series except for the toolhead. The Flexfeed extruder can adjust automatically to push multiple filament widths and does well with some of the softest TPU I’ve tried.
The H3C has active chamber heating, up to 65°C, goes to 350°C at the hot end and 120°C on the bed, which makes printing PPA and PPS, nylons, ABS, and ASA easy. For the smellier filaments, it has active carbon and HEPA filtration.
The ventilation is sufficient to run lower-temperature filaments like PLA with the printer’s door closed.
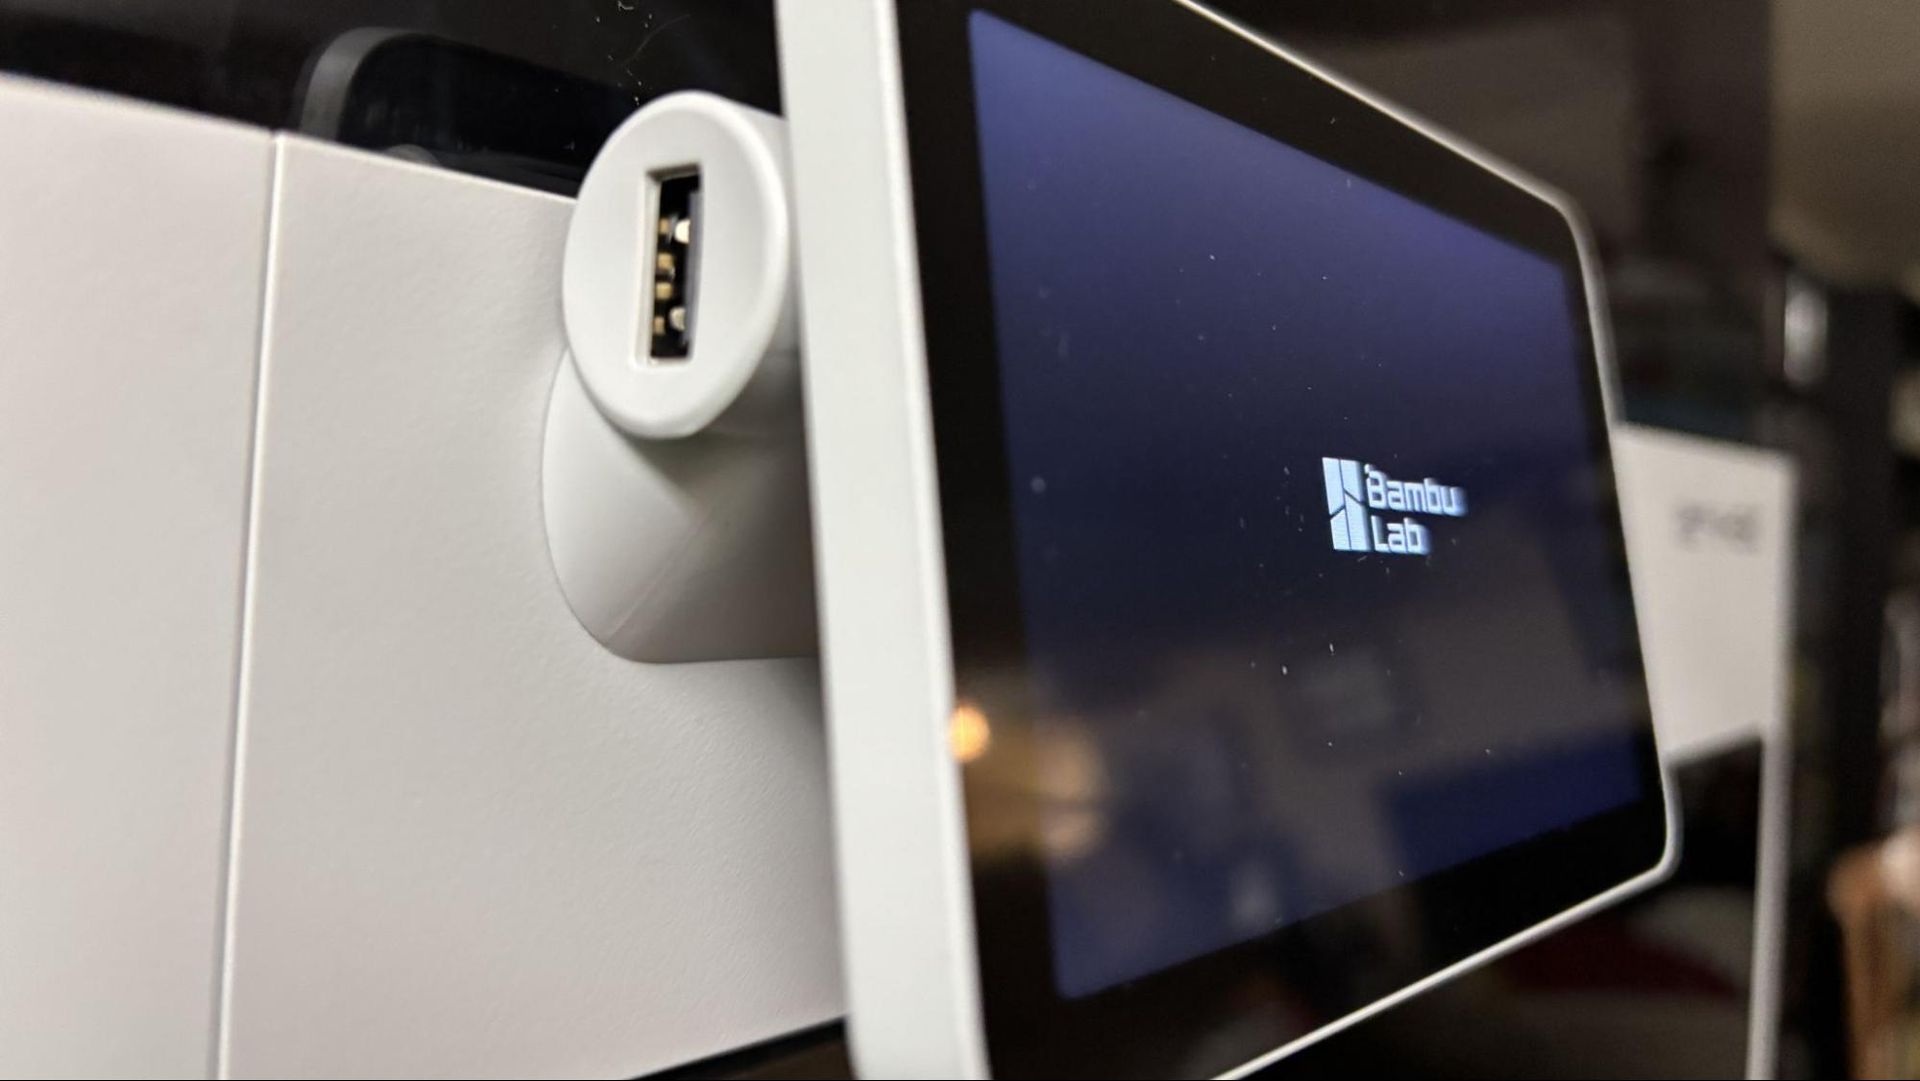
The printer has an excellent camera that is used for AI detection on prints and can be monitored from the Bambu Handy app as well as the device page of Bambu Slicer. The camera can also capture time-lapses of prints when a USB stick is inserted in the slot behind the touch screen.
The Bambu Lab H3C has a footprint similar to the other H series printers but does require space on both sides to access the side panels of the AMS 3H. With the top-mounted AMS and the space required for the tool wiring and Bowden tubes, the Bambu Lab H3C requires a total of 1306 mm in height (over four feet) to operate comfortably. When resting on a standard-height counter or the 3ft tall racks we normally use for our printers, I needed a small ladder to reach the rear spools in the AMS 3H. Even my husband, who is 6’4,” had to stretch to reach the back. Shortly after I had the printer set up, I received the Bambu Station, which, at 23.5 inches tall on its wheels, is a great solution for keeping this printer in reach. If you don’t have a shelf or table the height of a coffee table, I recommend getting one.
Bambu is also introducing a companion E1 Air Purifier that syncs with the H3C and activates when you start a print job. We did not receive an E1 to test, and we’re not sure if the air cleaner will be offered as a standalone product. It is part of the premium $3,049 combo that includes the printer, rolling cart, and several spools of filament.
Assembling the Bambu Lab H3C
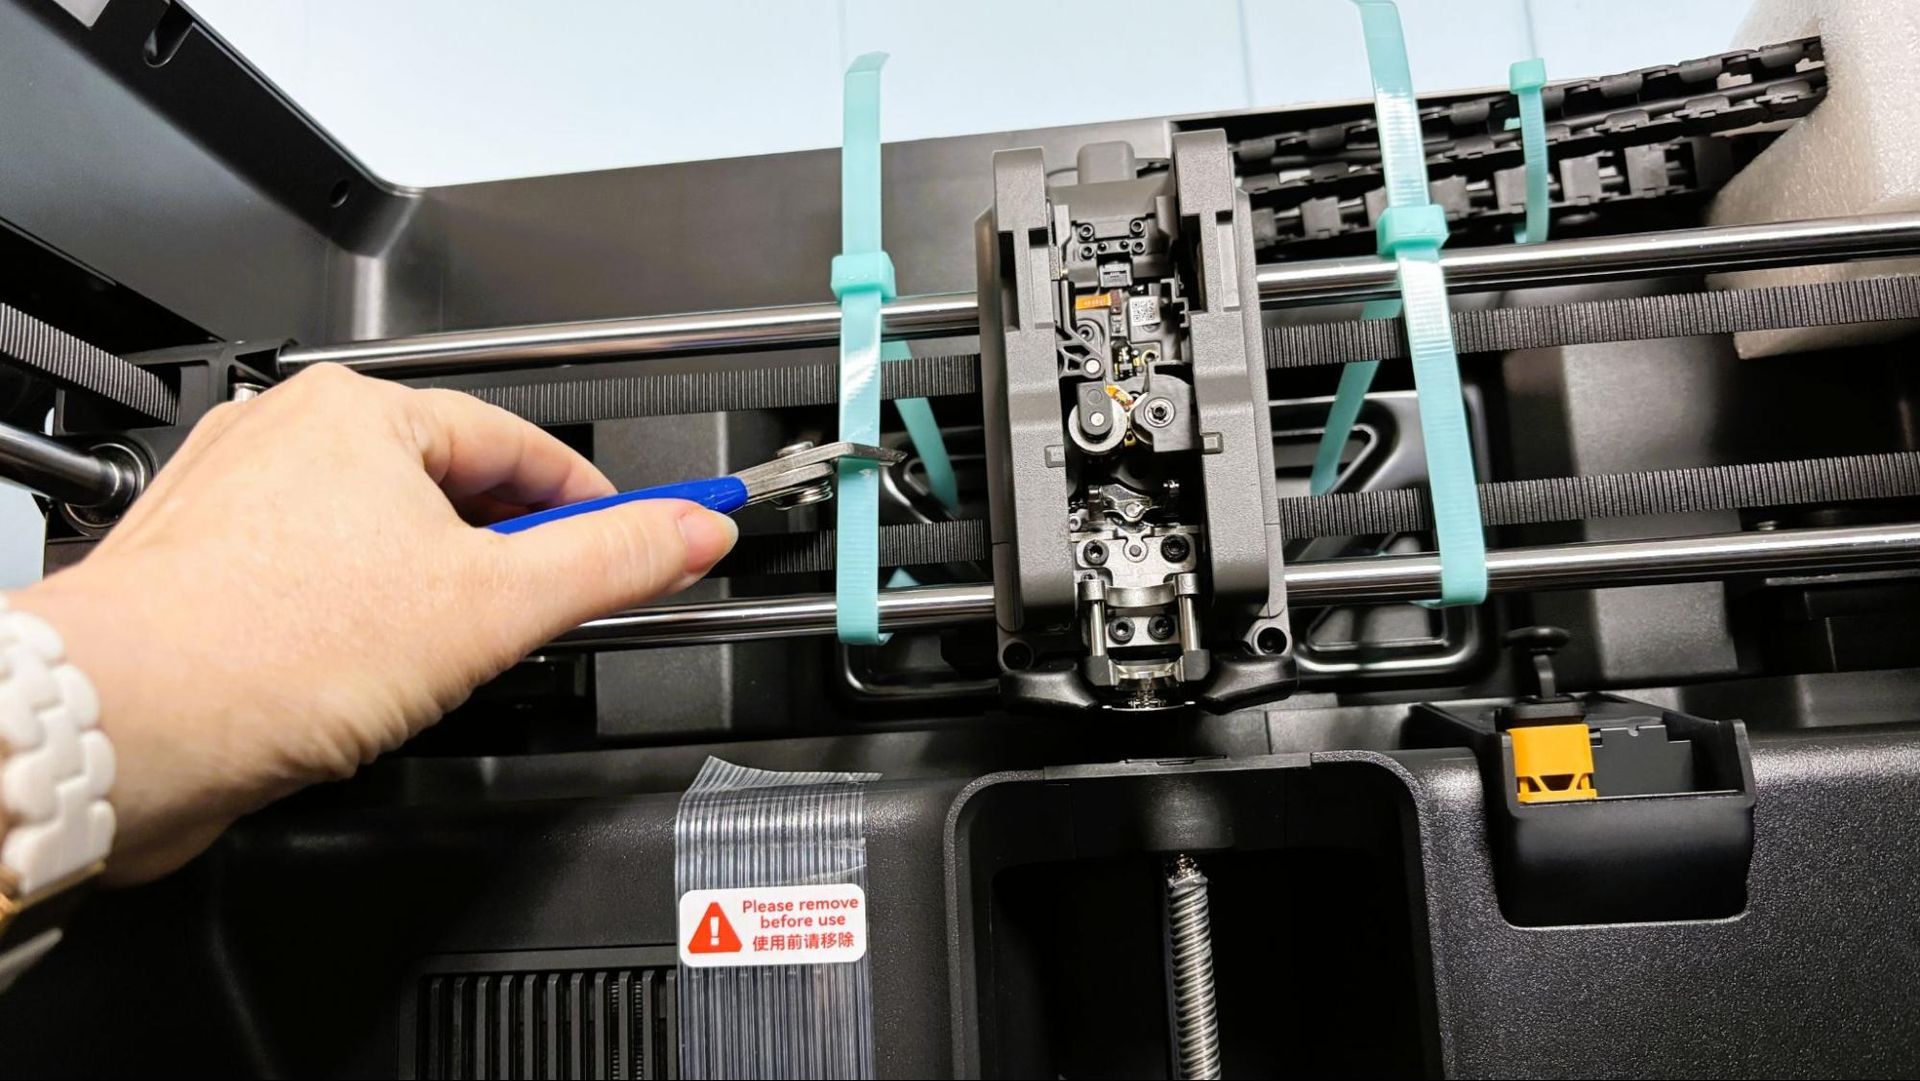
The Bambu Lab H3C arrives in two large assemblies: the main printer and all the things attached to the AMS 3H. After removing the packing material, zip ties holding the tool head in place, four screws holding the bed in place, and two retainers holding the rack in place, the AMS 3H can be hefted on top of the base unit. This is best done while the unit is on the floor or at least somewhere with a bunch of overhead clearance.
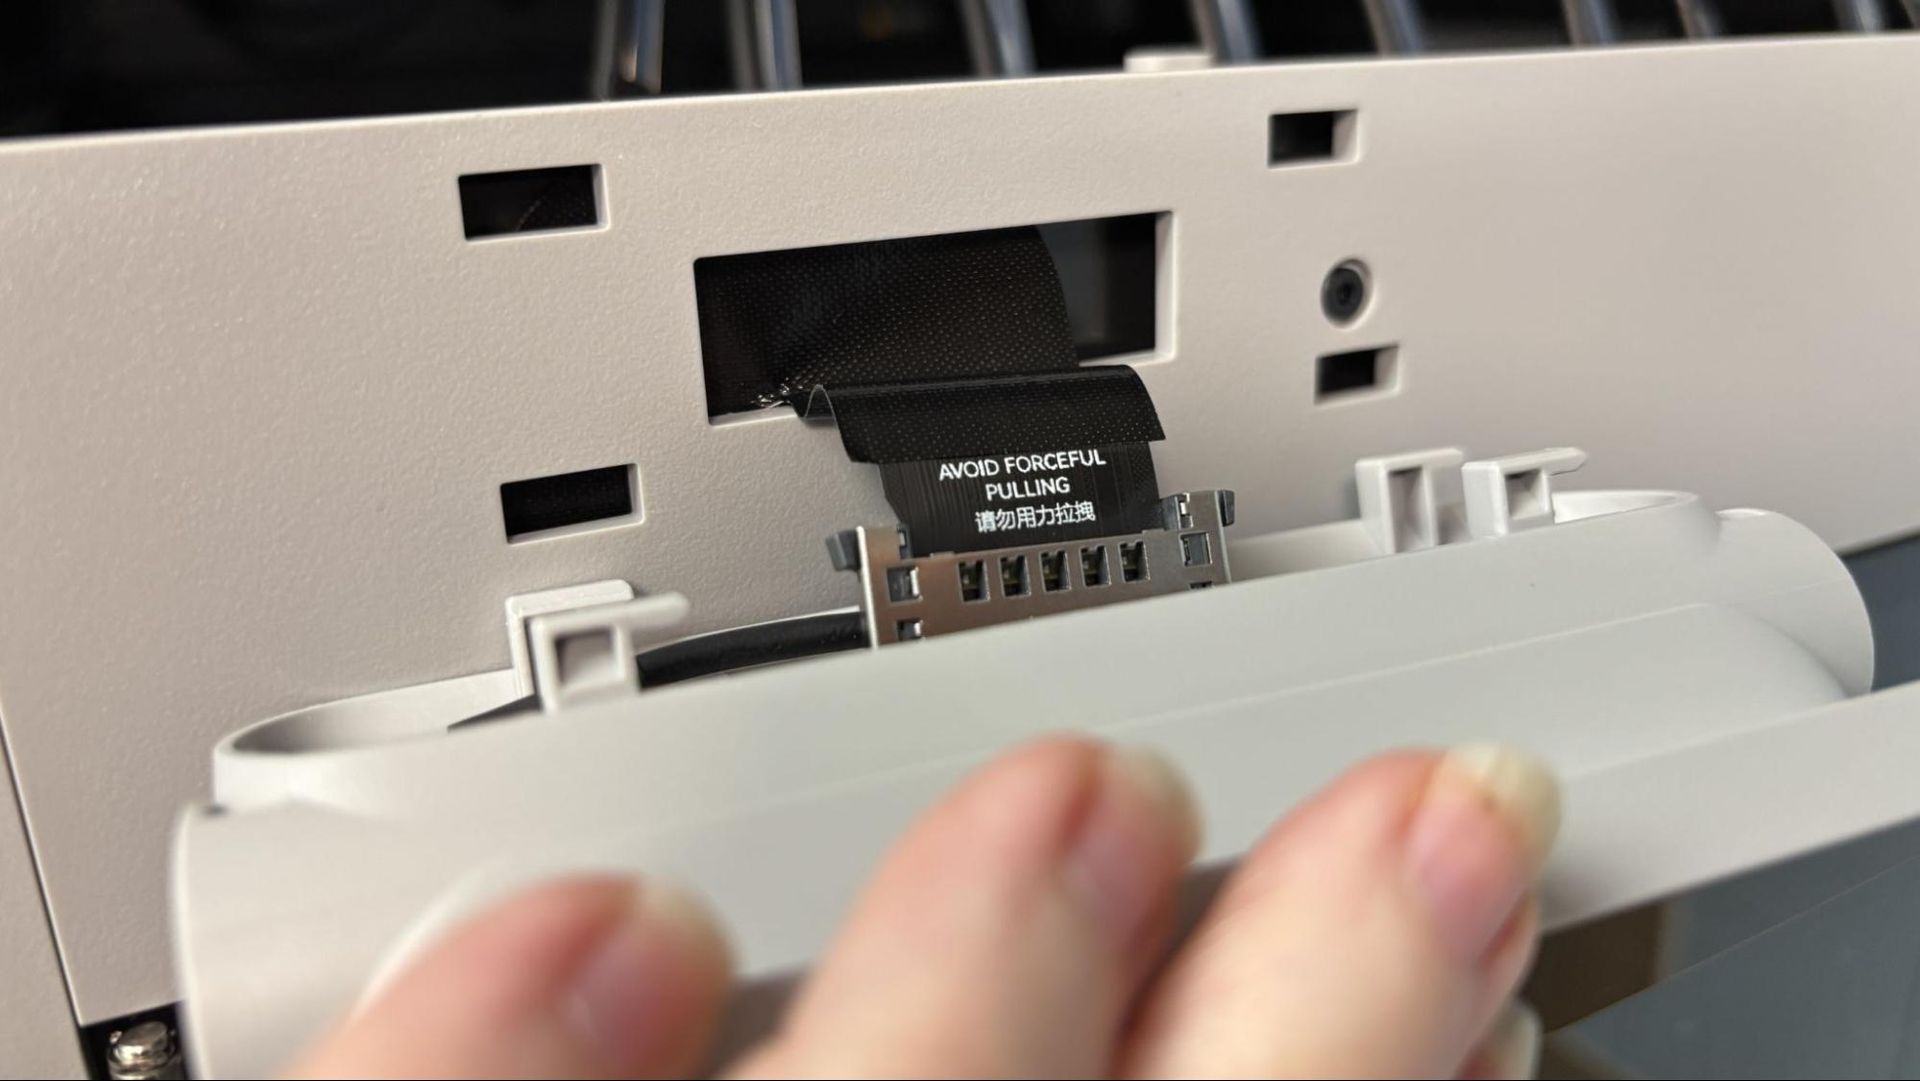
The touch screen attaches to the base unit without tools, and the ribbon cable is just long enough to reach the back of the screen. The nine tools have to be manually placed in the front rack, which takes some time until you learn how they attach. At least one needed to be attached once the printer was powered up.
The AMS 3H has its own power cord for the heater and a cable connecting it to the base. There are preinstalled screws to attach the Base unit to the AMS 3H, but I left these unused since removing the front panel requires tipping the AMS 3H back a bit.
Leveling the Bambu Lab H3C
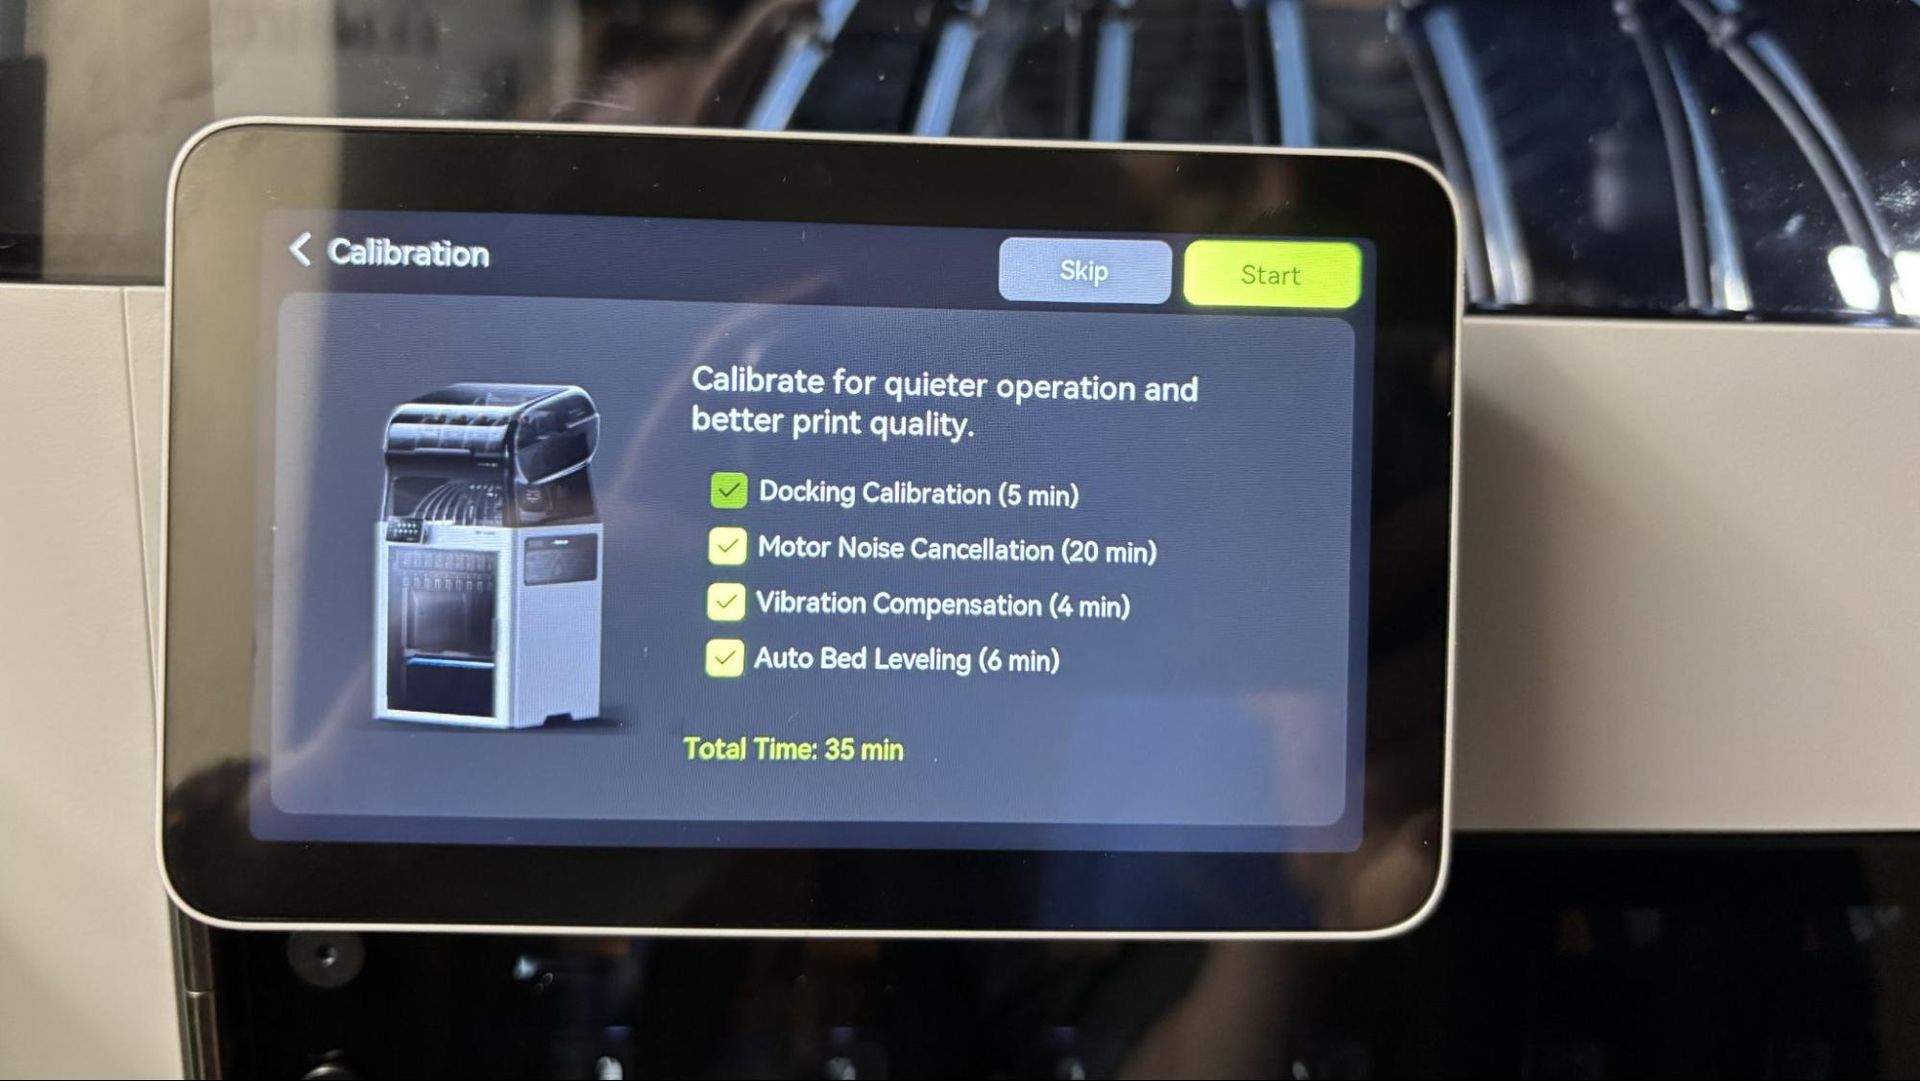
The Bambu Lab H3C performs a bed level as part of its initial calibration suite and again before each print. This works flawlessly in practice.
Loading Filament on the Bambu Lab H3C
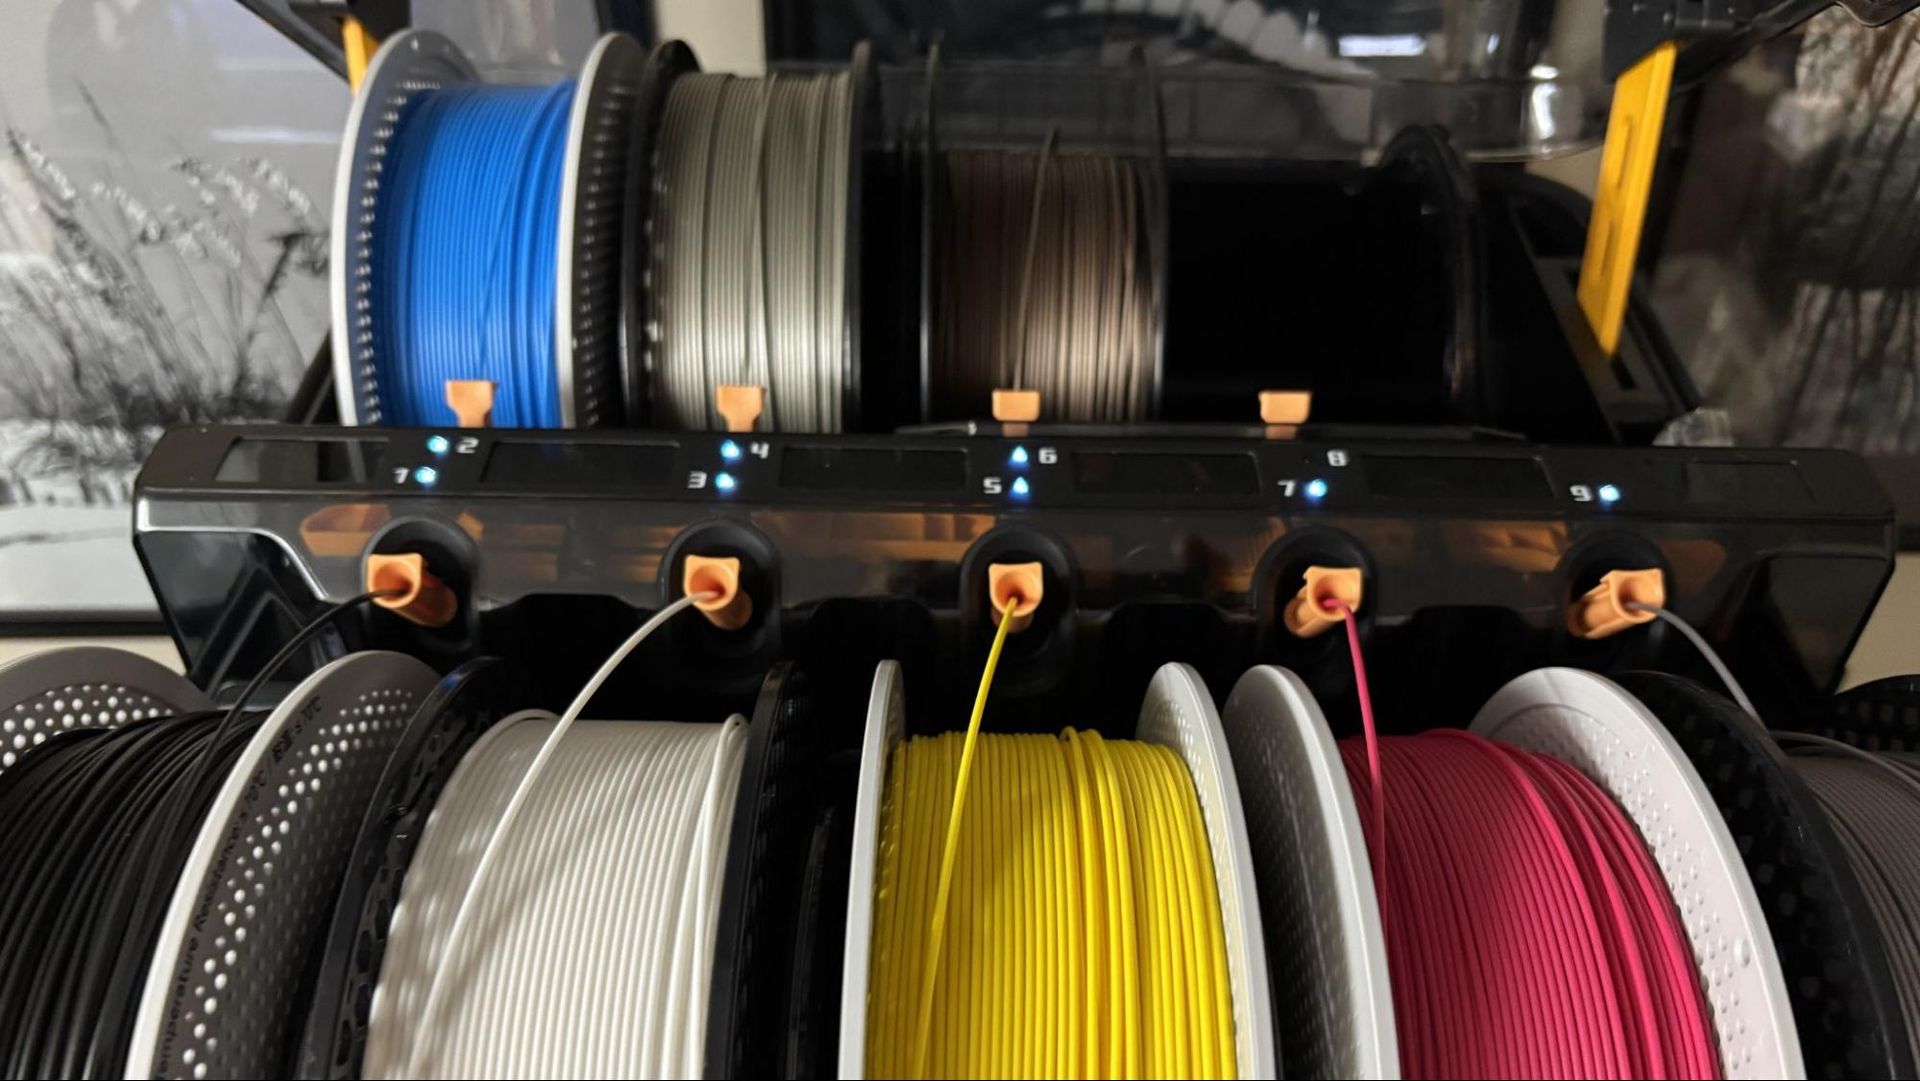
When using non-TPU 1.75mm filament, the AMS 3H loads filament just like a regular AMS. Filament is inserted into the feeder, which automatically pulls it into the toolhead when that tool is selected. The RFID tag on Bambu Lab branded filament will automatically enter the filament type and color. Other filament brands need to be entered manually into the printer via the touchscreen.
The AMS 3H does not have powered rollers to retract the filament. You will need to select Unload from the filament screen, and the printer will cut the filament and retract it from the tool head. You will need to manually pull the filament out the rest of the way.
2.85mm filament and softer TPU will need to be manually fed through a port on the bottom of the AMS 3H. All filament slots except 2 and 4 have this port. The filament bypasses the tubing to feed directly into the tools. The standard Bowden tube must be removed from the tool and inserted into a holder on the side. For 1.75mm TPU, a small piece of Bowden tube is inserted into the top of the tool to help feed the filament correctly. 2.85mm filament can be inserted directly into the tool. Once inserted, filament using the bypass must be loaded manually.
Preparing Files / Software for Bambu Lab H3C
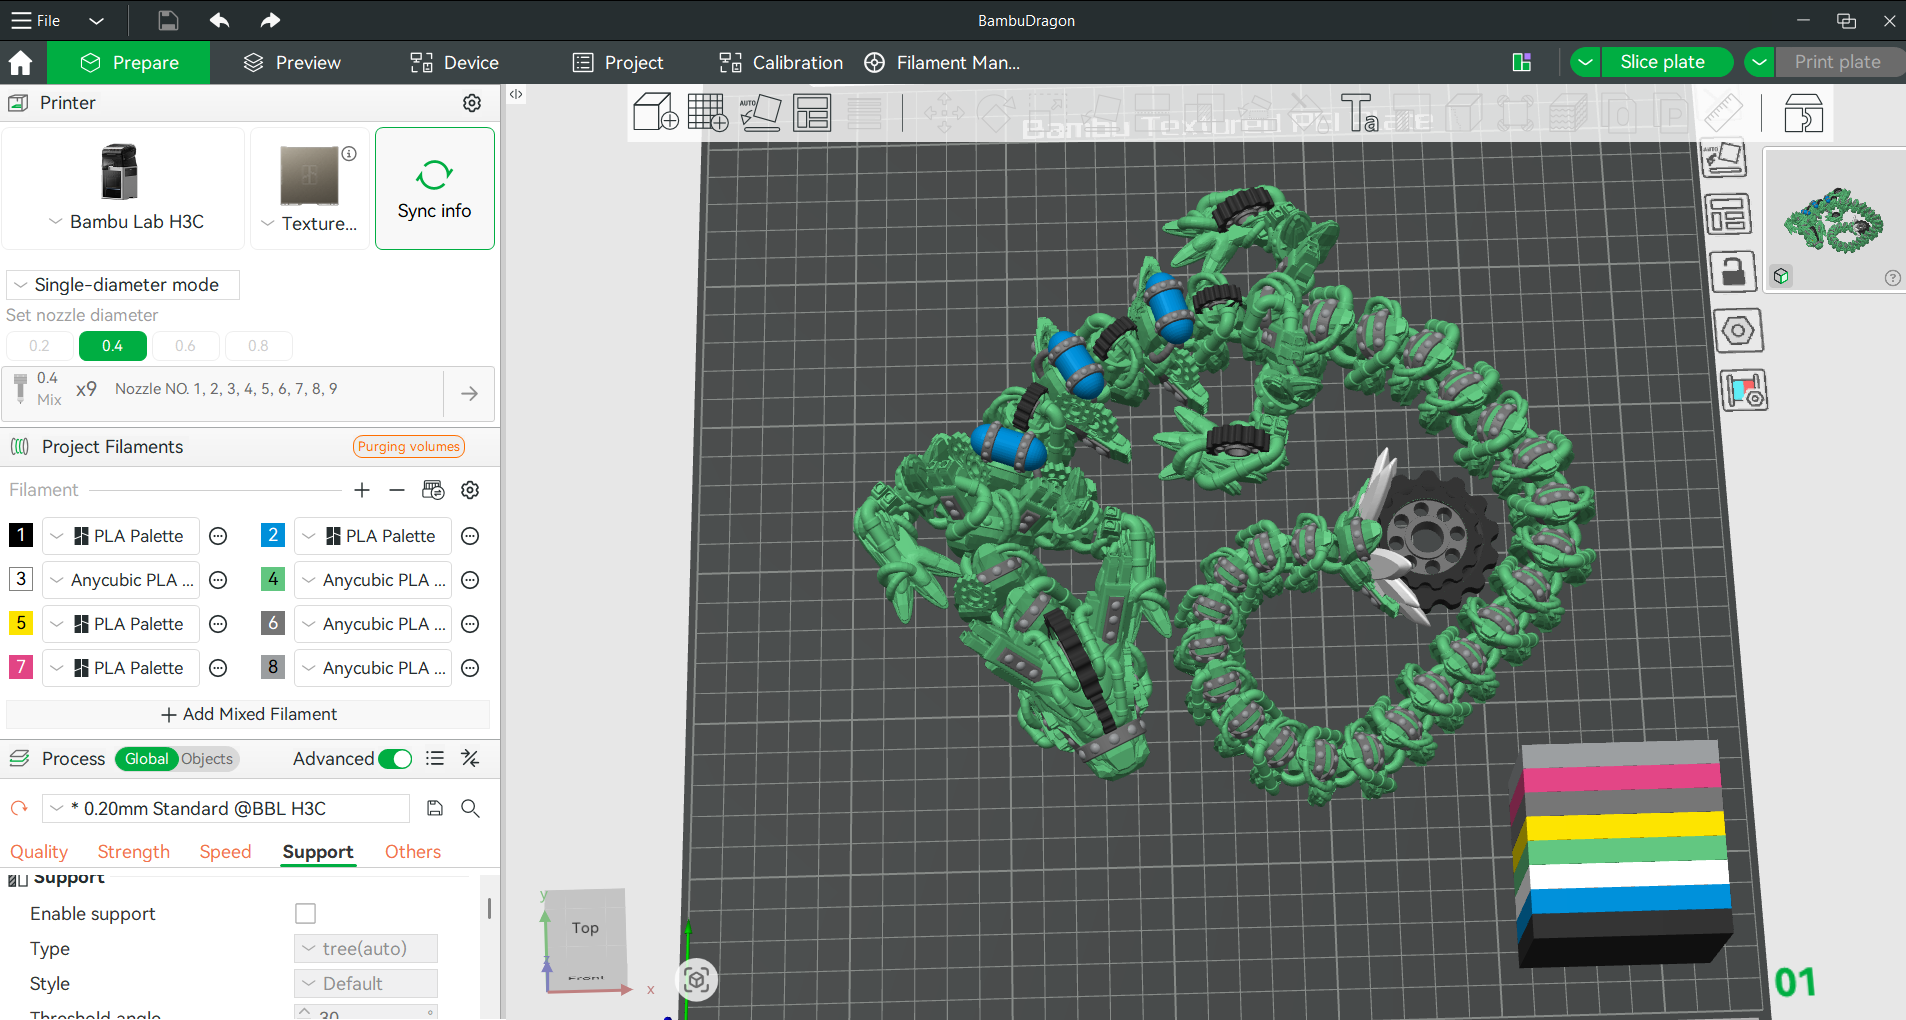
Bambu Studio, based on PrusaSlicer and its forbear, is one of the best slicers out there. Working seamlessly with the printer for filament mapping, control, monitoring, and access to all of the files on Makerworld, it is a joy to use.
Printing on the Bambu Lab H3C
The H3C is a much faster machine than its predecessors because it does not need to reel filament back and forth from the AMS. However, it still uses a purge tower, which can waste a bit of time and filament. It only takes about six seconds to swap tools, which is quite remarkable.
The H3C did not come with filament samples, but Bambu Lab did send along several spools of PLA Palette and spools of 2.85 75A TPU to try. You’re going to need a bunch of filament for this beast, so check out our list of best filaments for 3D printing for suggestions.
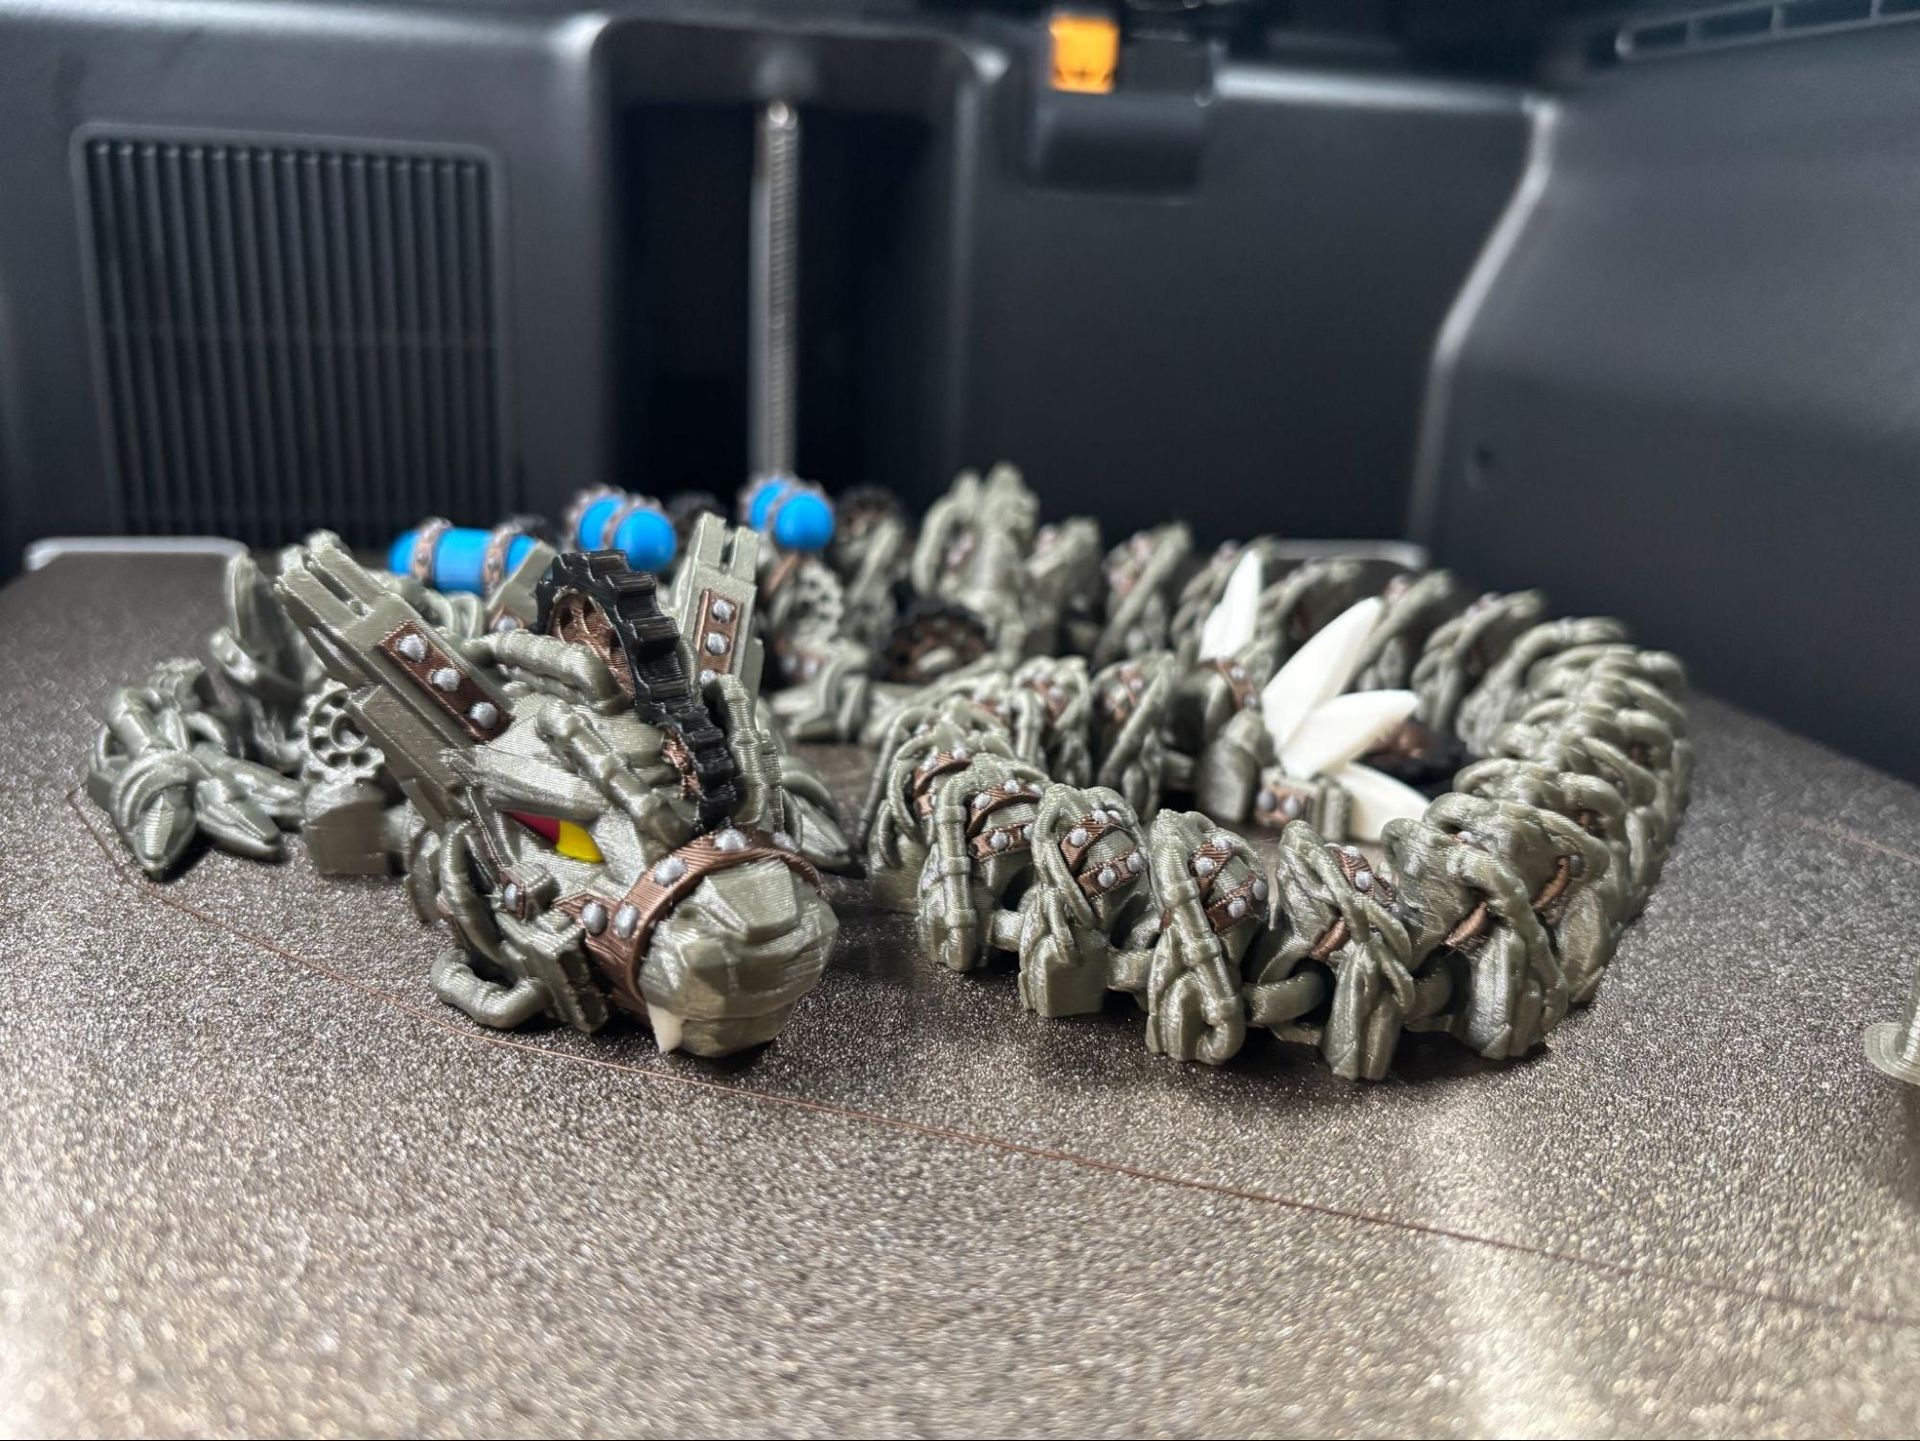
To get the measure of the Bambu Lab H3C, I loaded up one of my favorite prints, a steampunk dragon by the designer Cinderwing 3D. I had previously printed it in eight PLA colors using two AMS modules on an Anycubic Kobra 3 Max, which is a bed slinger. That first print took 37 hours and 28 minutes and wasted 267g of filament in poop and purge.
Using a .2mm layer height and an average print speed of 140mm/s, the H3C cut that time down to a bit less than 24 hours, and only wasted 68g in its purge tower. The print quality is excellent, and all the colors came out clean. The main color is Prusa Pearl Mouse, Polymaker Panchroma Silver, and black, white, magenta, yellow, and cyan from Bambu’s new Palette PLA, which is actually designed for color mixing.
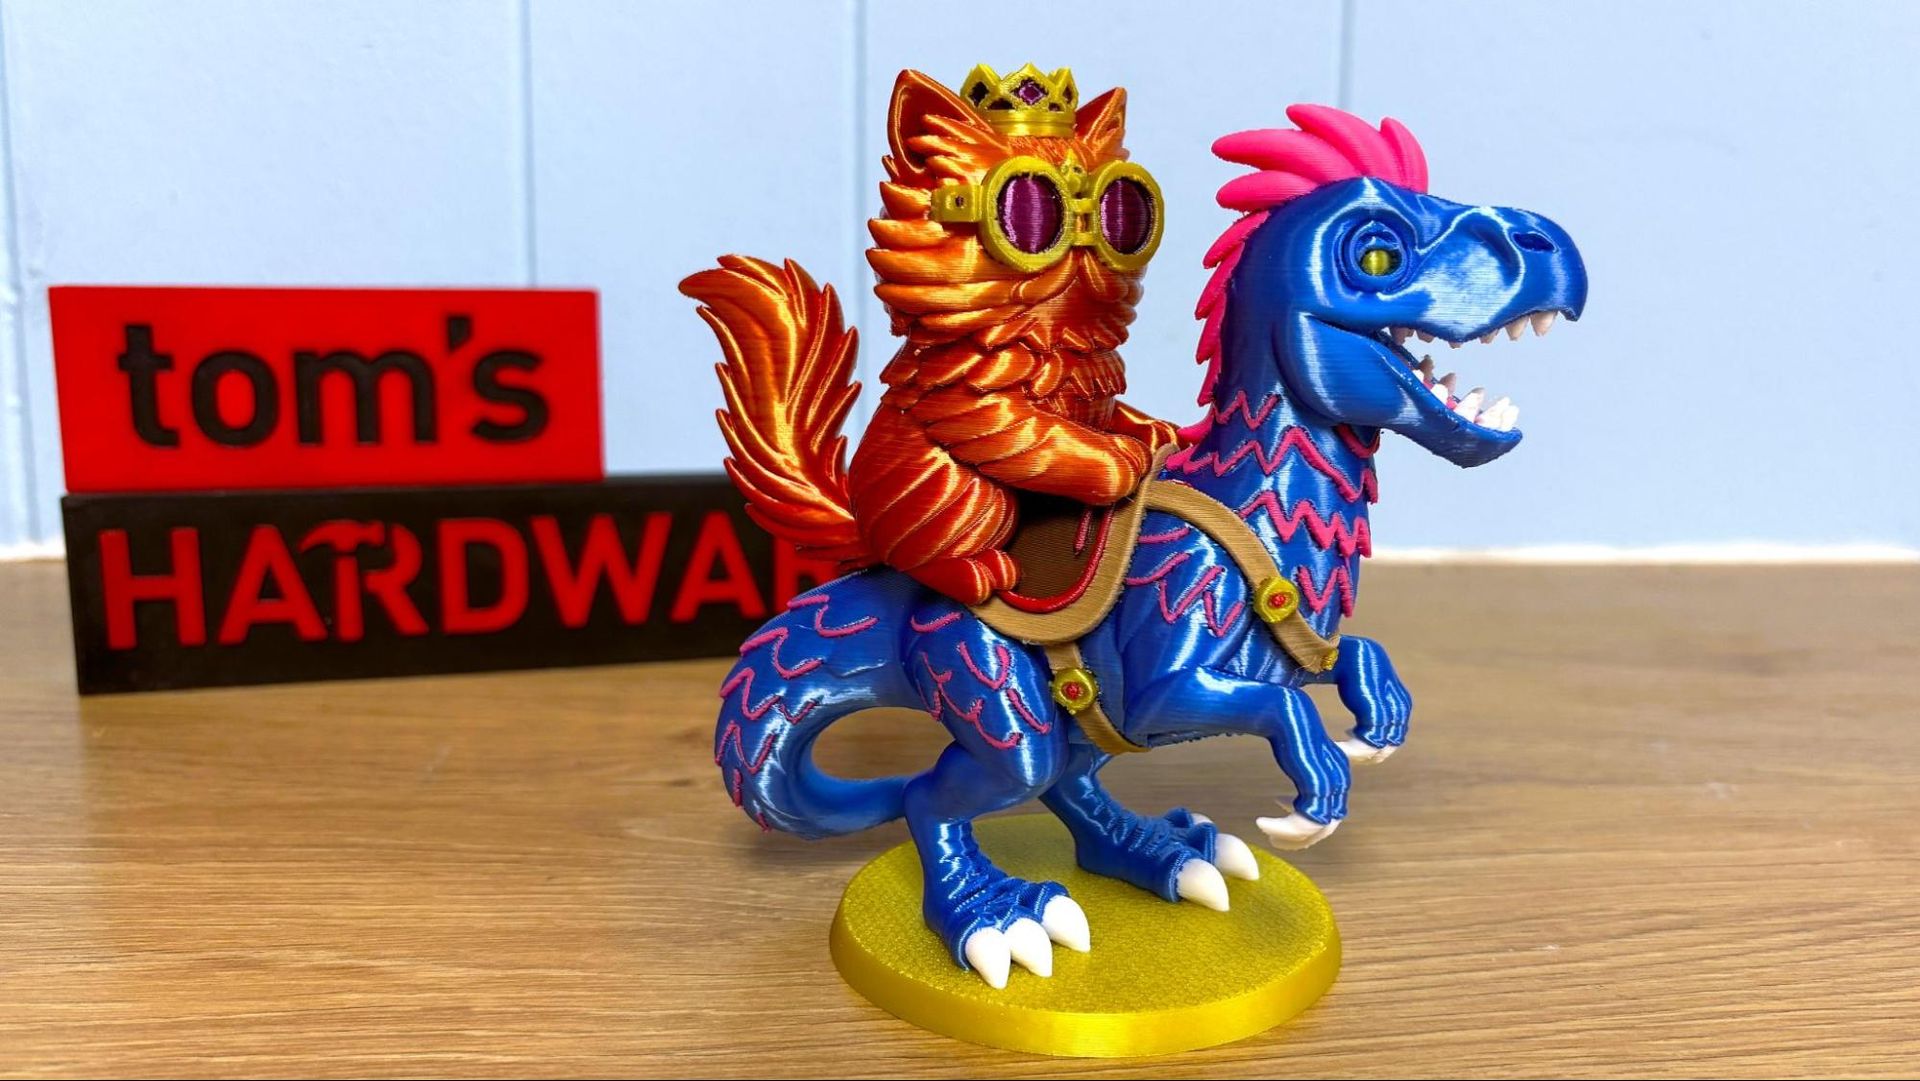
Eight colors were not enough. I swapped out the 2.85mm tool with the spare 1.75mm tool and printed a nine-color Princess Donut and Mongo from Dungeon Crawler Carl (my latest obsession). I have been using this print to test out other tool changers for a future comparison. The print came out fantastic, with super shiny silks and clean color transitions. I had to “hand paint” this in Bambu Slicer, which took a bit of time. The teeth on the print are a bit shaky, but that is due to the insane amount of support this model required.
This printed in 15 hours and 12 minutes, with a 152.6-gram prime tower, using a .2mm layer height and default settings. For comparison, the same print with the same settings but only 5 colors on the H2C took 24 hours and 44 minutes and used 111.4grams on its prime tower. The Prusa INDX took a similar amount of time (15 hours and 38 minutes) to run the same print in 8 colors, but only needed to waste 24grams of prime purge.
Filaments:
Princess Donut (Cat) Polymaker dual silk sunset gold-red, Polymaker Panchroma Silk Purple, Jessie Elixir Electric Lemonade.
Mongo (Dinosaur): Polymaker silk blue, Polymaker white HT-PLA Pro, Bambu pink PLA basic.
Saddle: Inland brown PLA+, Hobby Lobby PLA wood, Elegoo red silk PLA.
The Bambu Lab H3C is one of the best printers I’ve tested for printing TPU. The AMS 3H bypass ports require a tiny bit of set up, but they are much better than dealing with an external spool holder. With nine slots at my disposal, I can always have a spool of TPU ready to go.
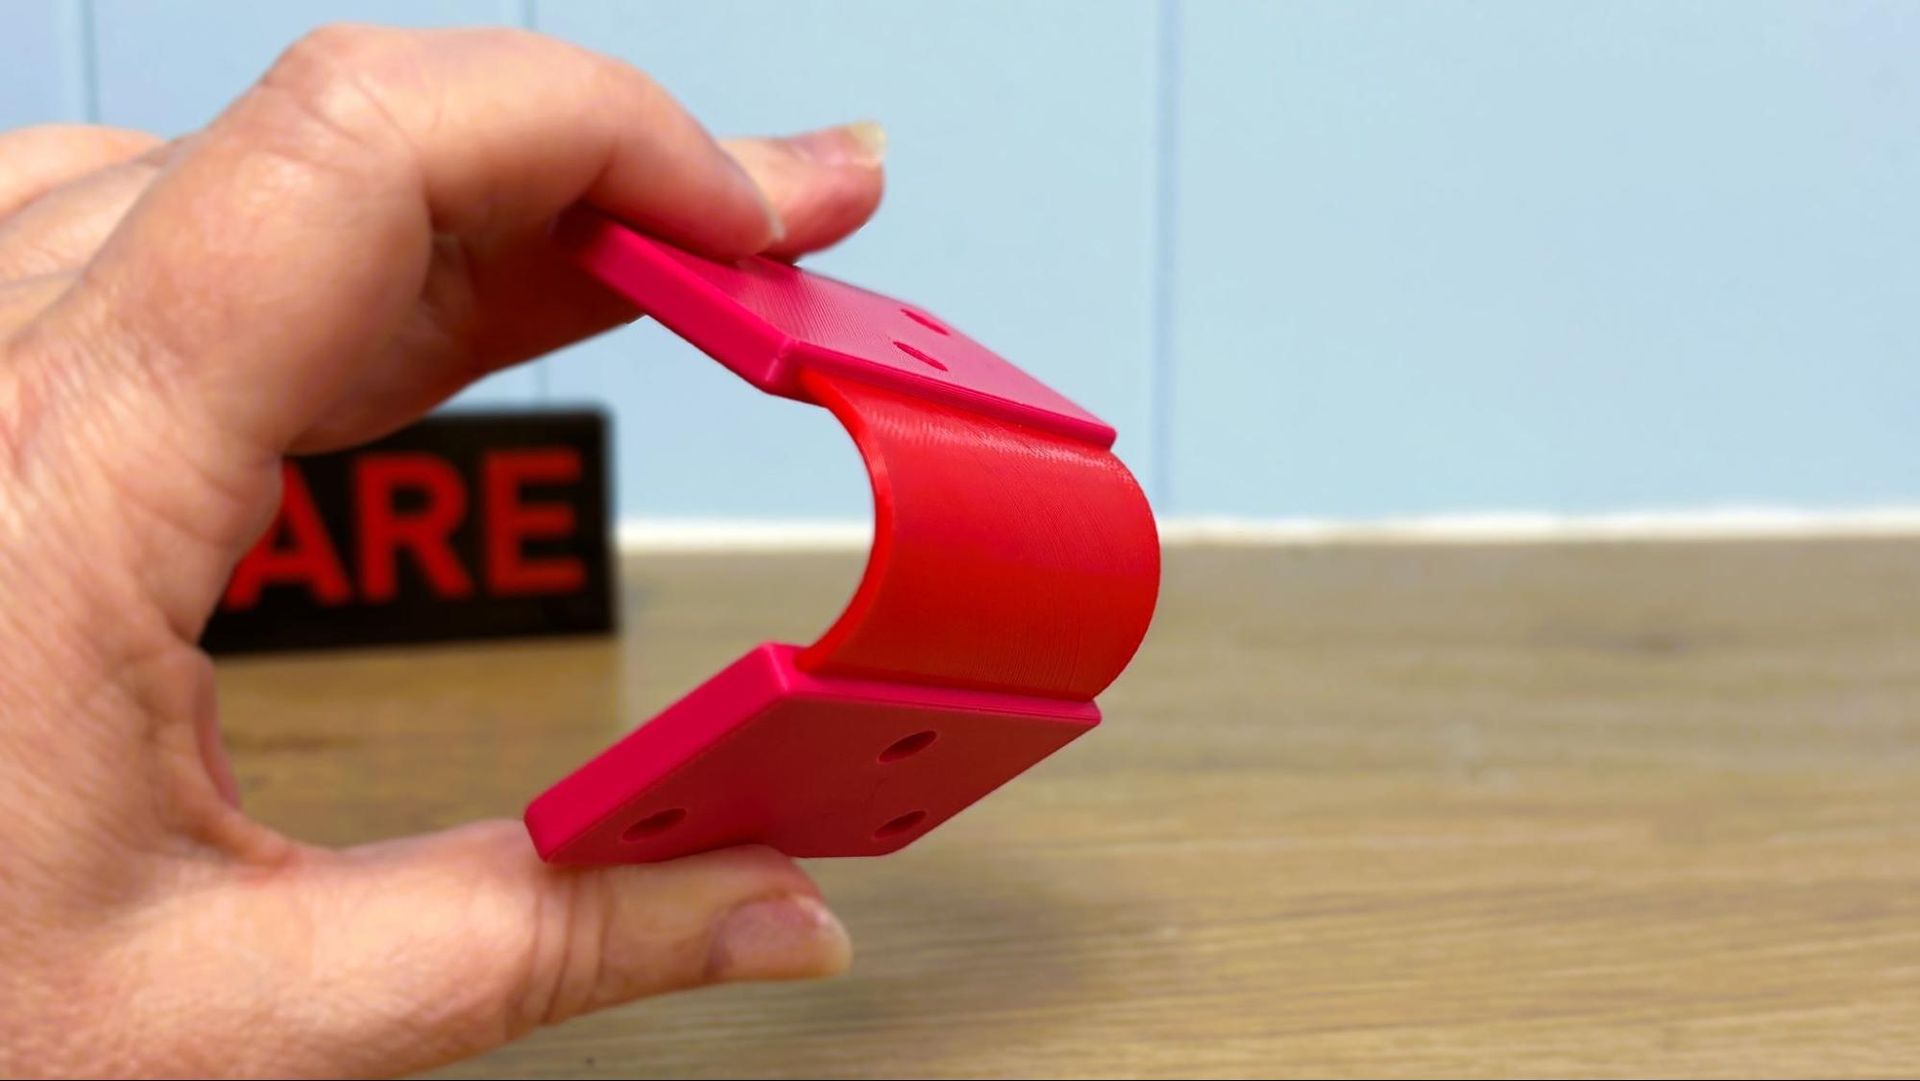
My first TPU print was a strap hinge that combines normal 95A TPU with stiff PLA brackets. The designer wove the two filaments together manually, though you can make your own hinges flexible by using “beam interlocking” in the slicer.
I printed this in Polymaker red PLA and Polymaker red TPU 95A and the hinge is extremely strong. Printed with a .2mm layer height and running at an average speed of 115 mm/s the print completed in just over an hour.
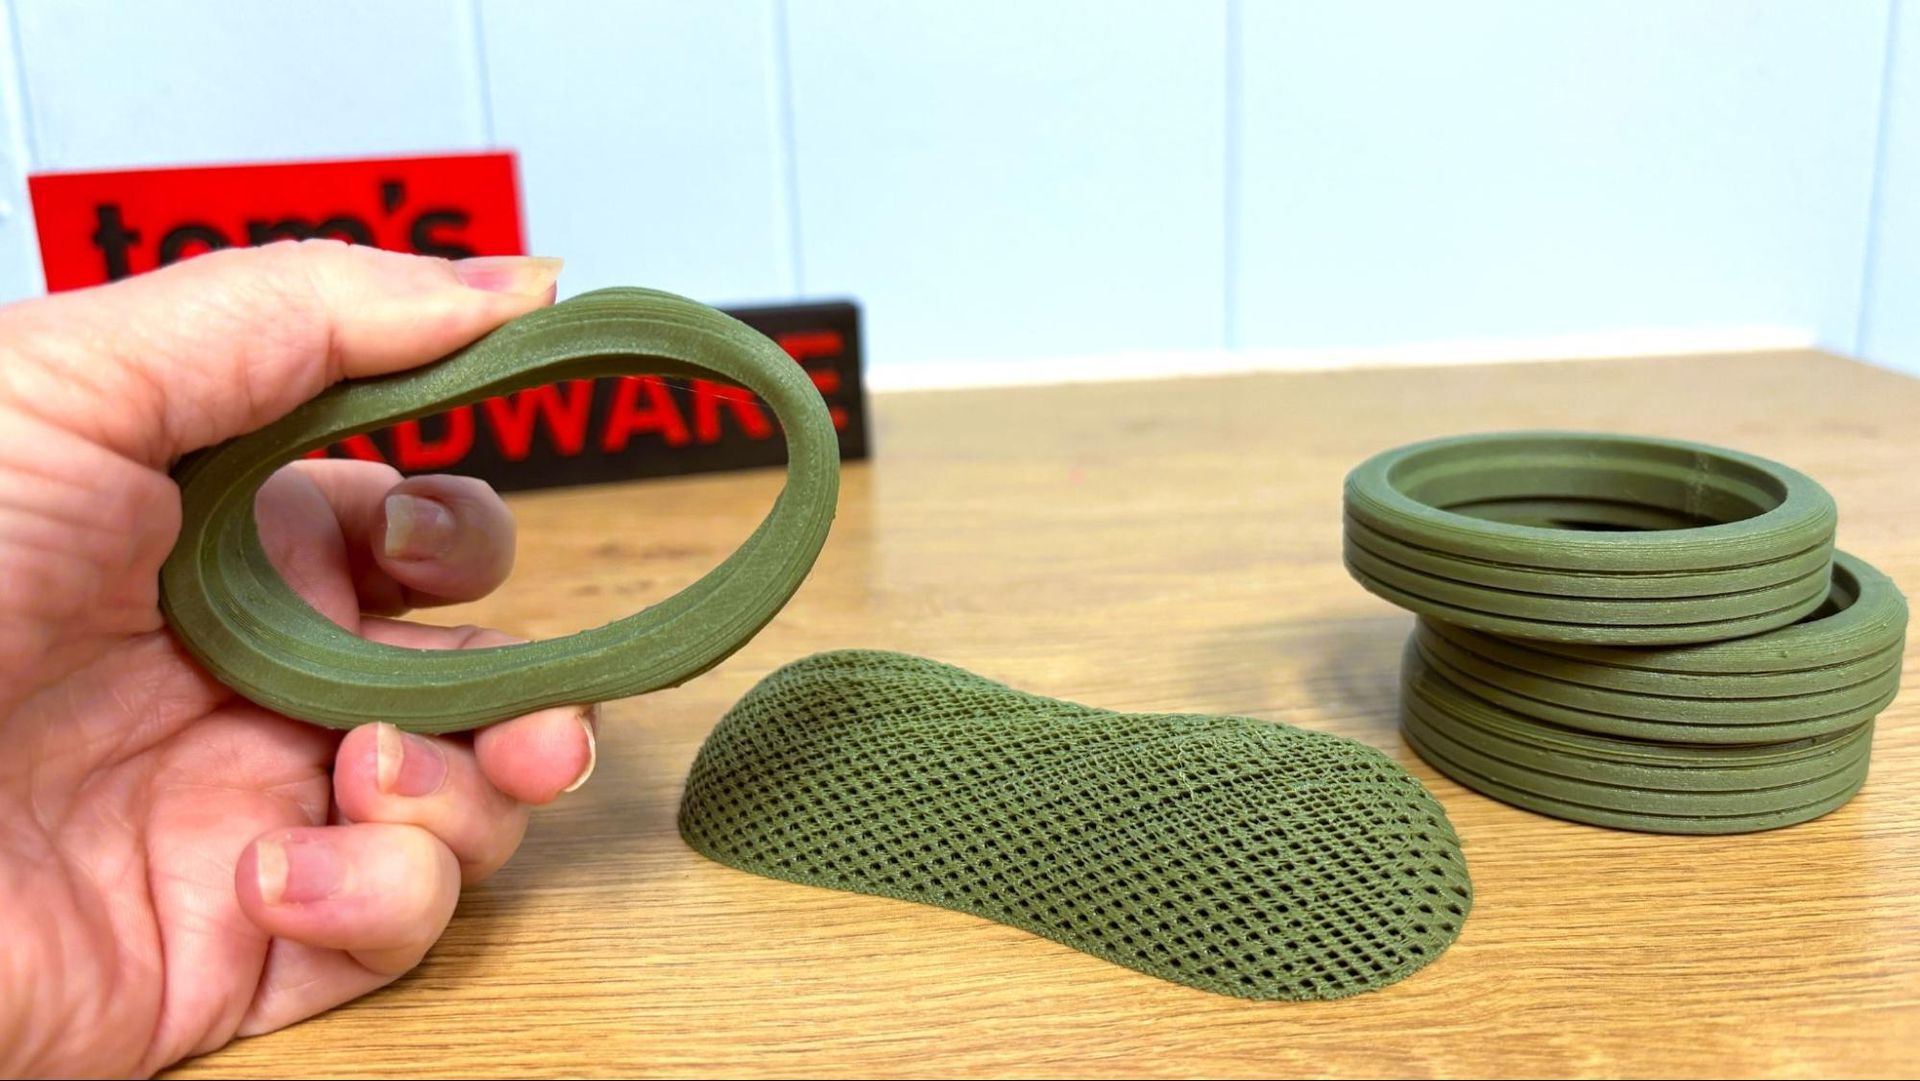
I was excited to try the 2.85mm 75A TPU that Bambu Lab sent, and it did not disappoint. The 2.85mm nozzle comes preset to run filament directly from the bypass and just requires manual loading. This is the softest TPU I’ve ever run, and the FlexFeed extruder handled it perfectly.
I first ran the wrist rest from the printer’s memory using Bambu Lab’s green 75A TPU. The print took 50 minutes to run, used only 20g of filament, and is very squishy. I used the same filament and printed some tires for an RC project I’m working on. Using a .2mm layer height and an average print speed of 75mm/s the tires took 57 minutes per set of two. They look nice and are super squishy. They only have 2 walls and 7% concentric infill, so they are extremely lightweight.
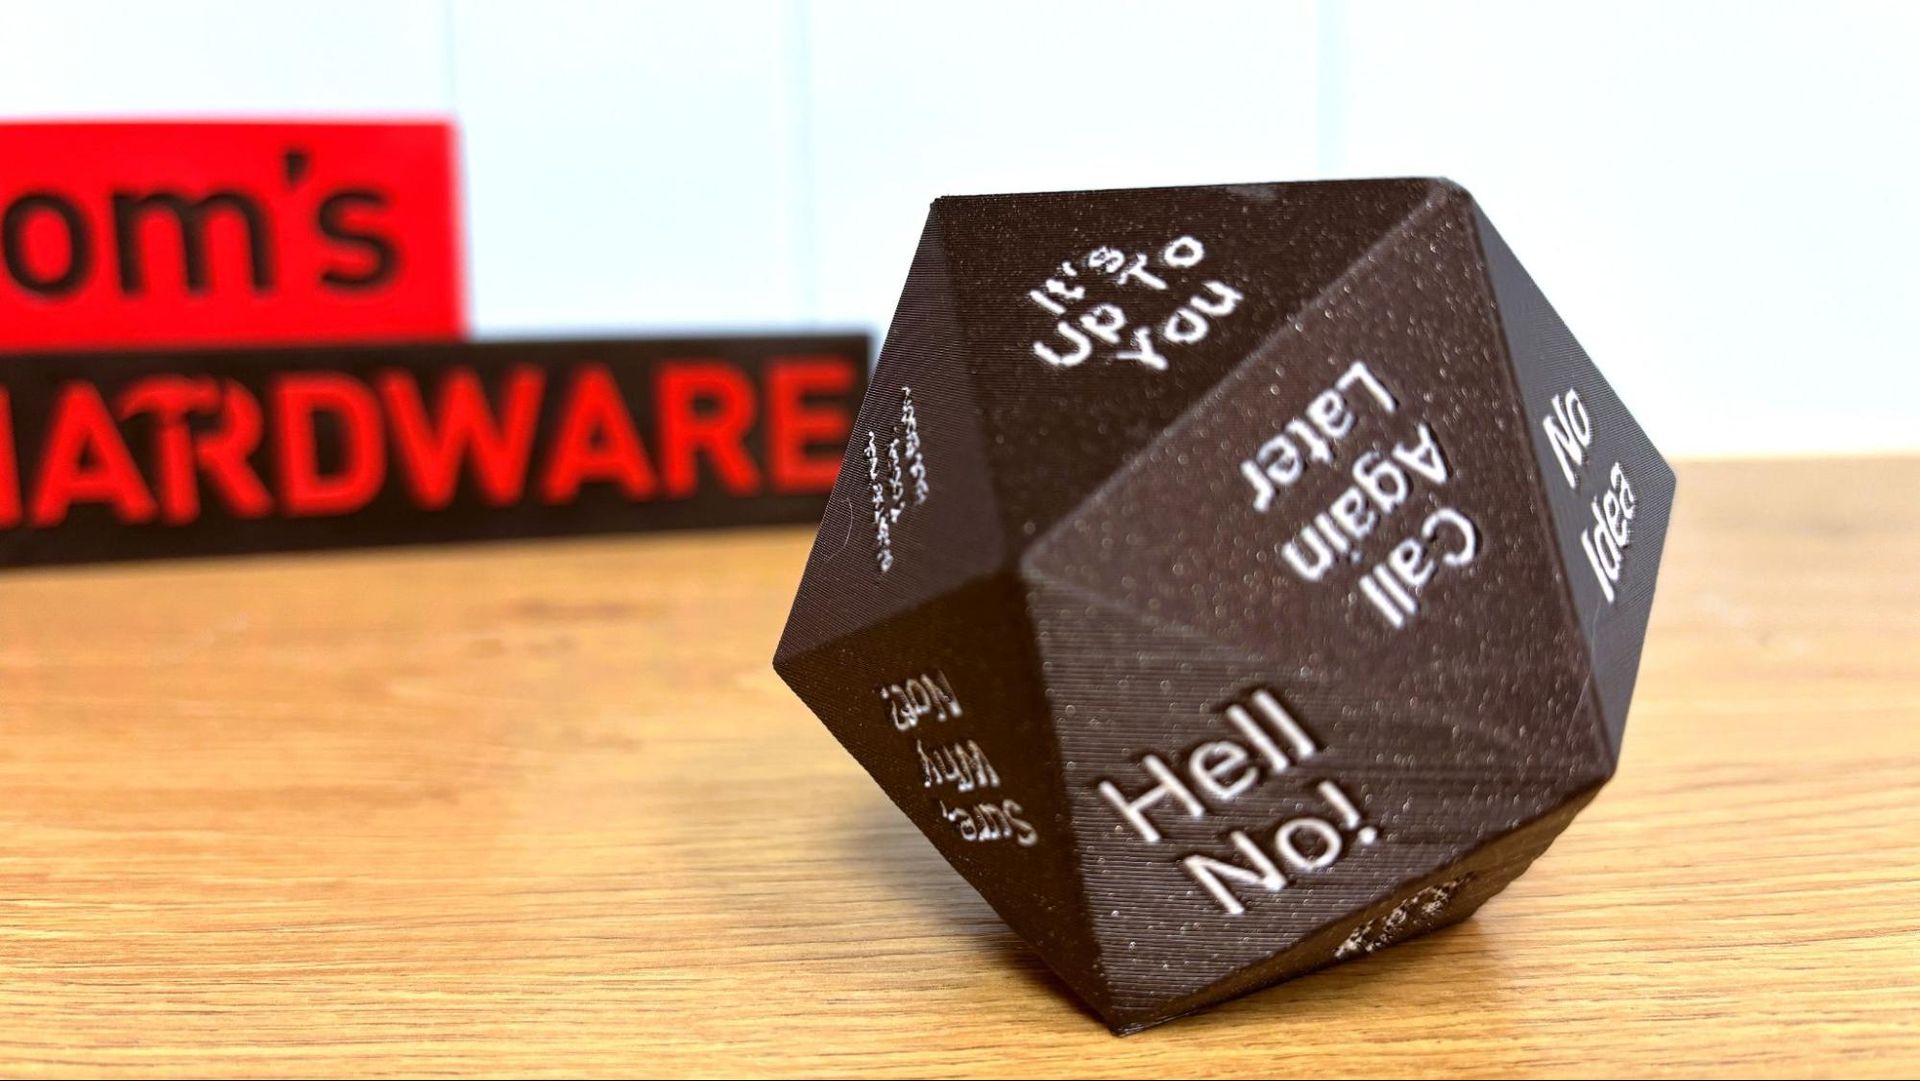
For ABS, I ran a two-color Magic 8-ball-style D20. Dice Studio lets you print custom dice with numbers or text and export it as a 3mf file ready to print. This is printed in Ionized Cobalt Black Matte ABS and Natural Matte ABS from Fusion Filaments. The print was very nice, with just a little roughness on the overhangs on the very bottom of the die, and a little roughness on the text where it becomes very small.
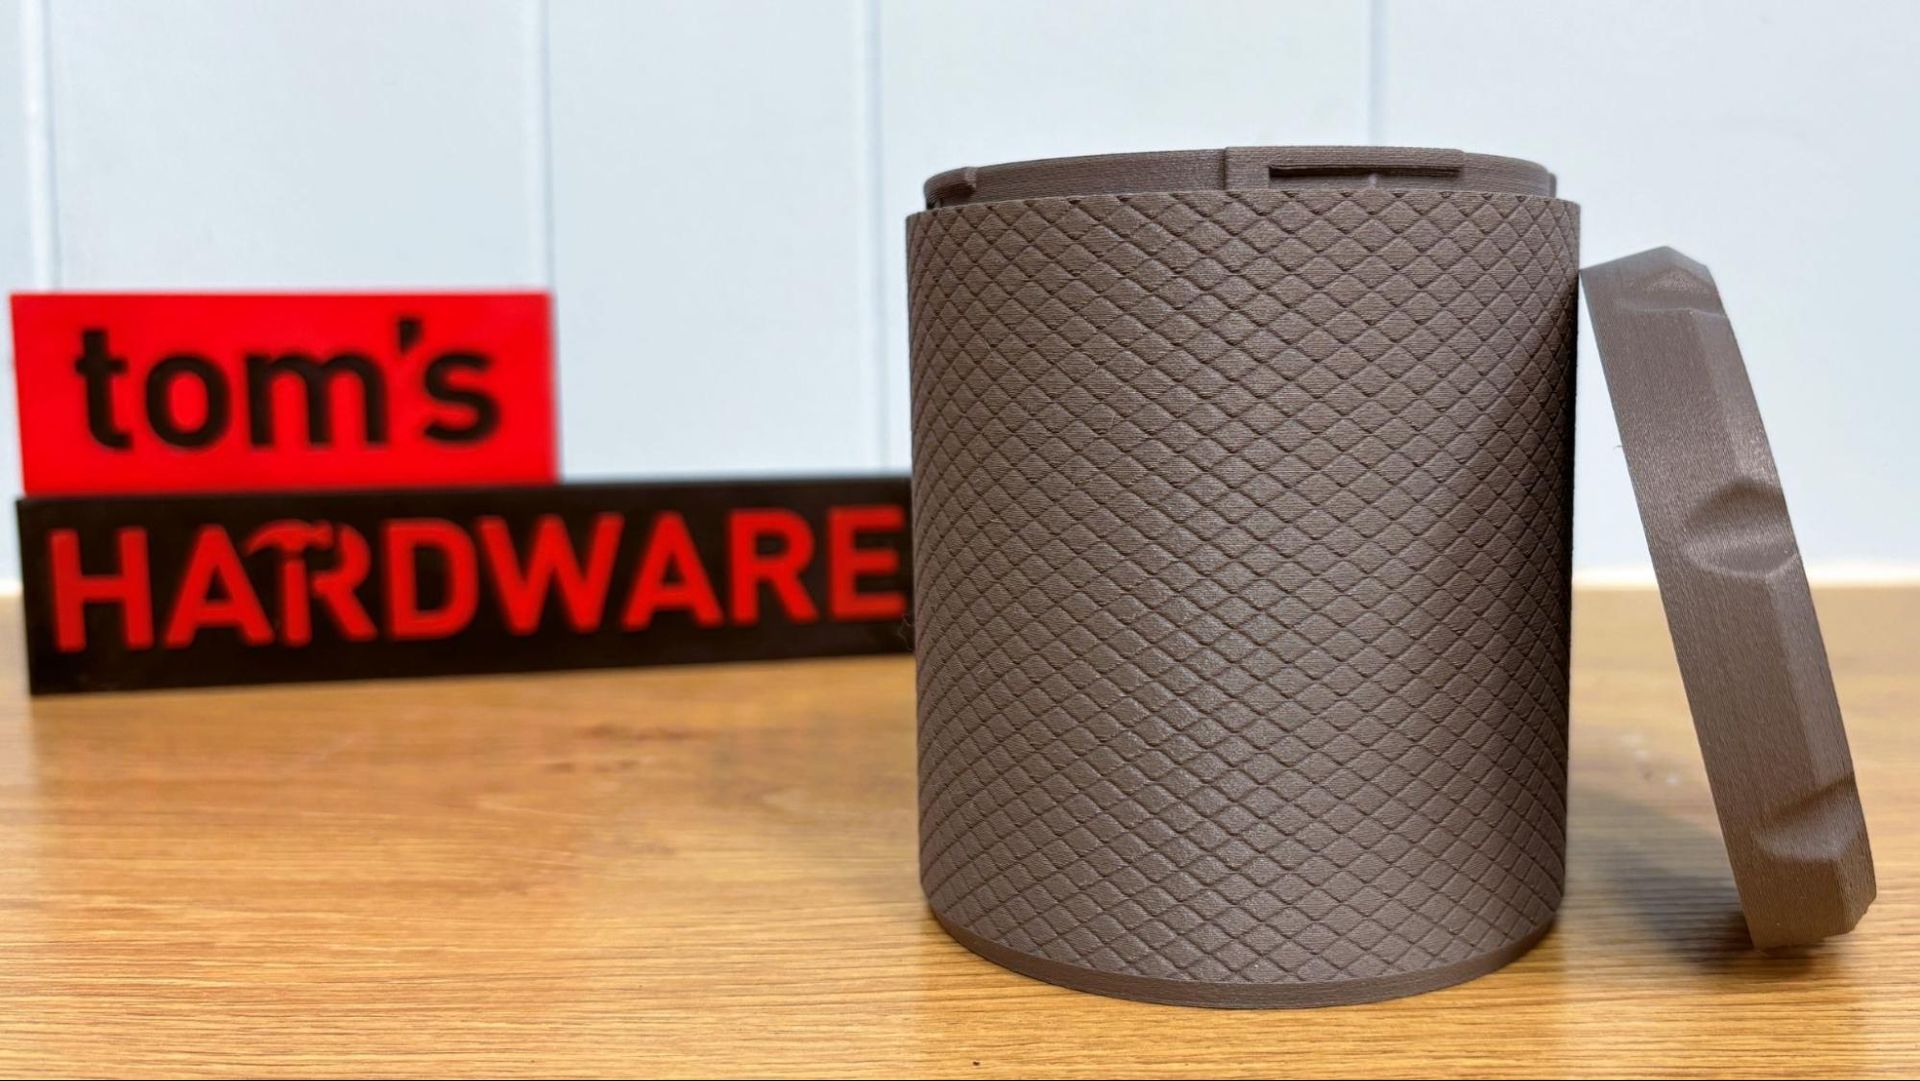
To really test out the heated chamber, I used a filament I struggle with: PA6 GF. I printed a Twist Lock Container using grey PA6 GF from Sunlu. I ran it with 3 walls and a .2mm layer height at an average speed of 140mm/s. The print took nearly 6 hours to complete. The result is a nearly indestructible canister that looks good too.
Bottom Line
The H3C is quite the multimaterial powerhouse and handles every material equally well. I don’t own any filament that it can’t print well, from soft TPU to PPS. Multiple nozzle sizes and multiple filament sizes can all be used together, and you’ve got nine places to put it all. Unless you need a print farm, I can’t really see the need for a different printer. This is a one-stop shop.
With a retail price of $2,499 for the H3C Tool Changer, this is a printer to definitely put on your wish list. In fact, I’m so impressed with the tool changer aspect, I keep forgetting that it’s also a helmet-class printer, which makes this machine capable of handling nearly any print you need to create.
If the Bambu Lab H3C seems out of reach, you can also check out last year’s Bambu Lab H2C, which is no slouch at multimaterial and has the same build volume. It’s currently on sale for $1,899 with a four-color AMS combo. The Snapmaker U1 is the most affordable tool changer we like on the market right now, and though it is smaller and only four-color, the $699 Black Friday price tag is very tempting. And of course, we have the Prusa CORE One INDX eight-color machine for those who want to keep their printers off the cloud, currently retailing at $1,949 as a kit.


